a 3d animation i made for school

Finish a new model/mesh? Got something you're working on? Finish a new map? Here's the place to post it for feedback and whatnot.
Post Reply

rate my work! feedback appreciated!

5/5
5
100%
4/5
0
No votes
3/5
0
No votes
2/5
0
No votes
1/5
0
No votes
 
Total votes: 5

User avatar
[cc]z@nd!


Literarian 500

Posts: 2297
Joined: Tue May 04, 2004 1:52 pm
Location: michigan

a 3d animation i made for school

Post by [cc]z@nd! »

well, i thought that at least some of you might be interested in this, so here goes.

for a biology project, where we had to make a model of DNA, i thought i'd be original and make a 3d animation. no one else would have the same idea as me, and i'd get an A for sure! thus, the dna project was born.


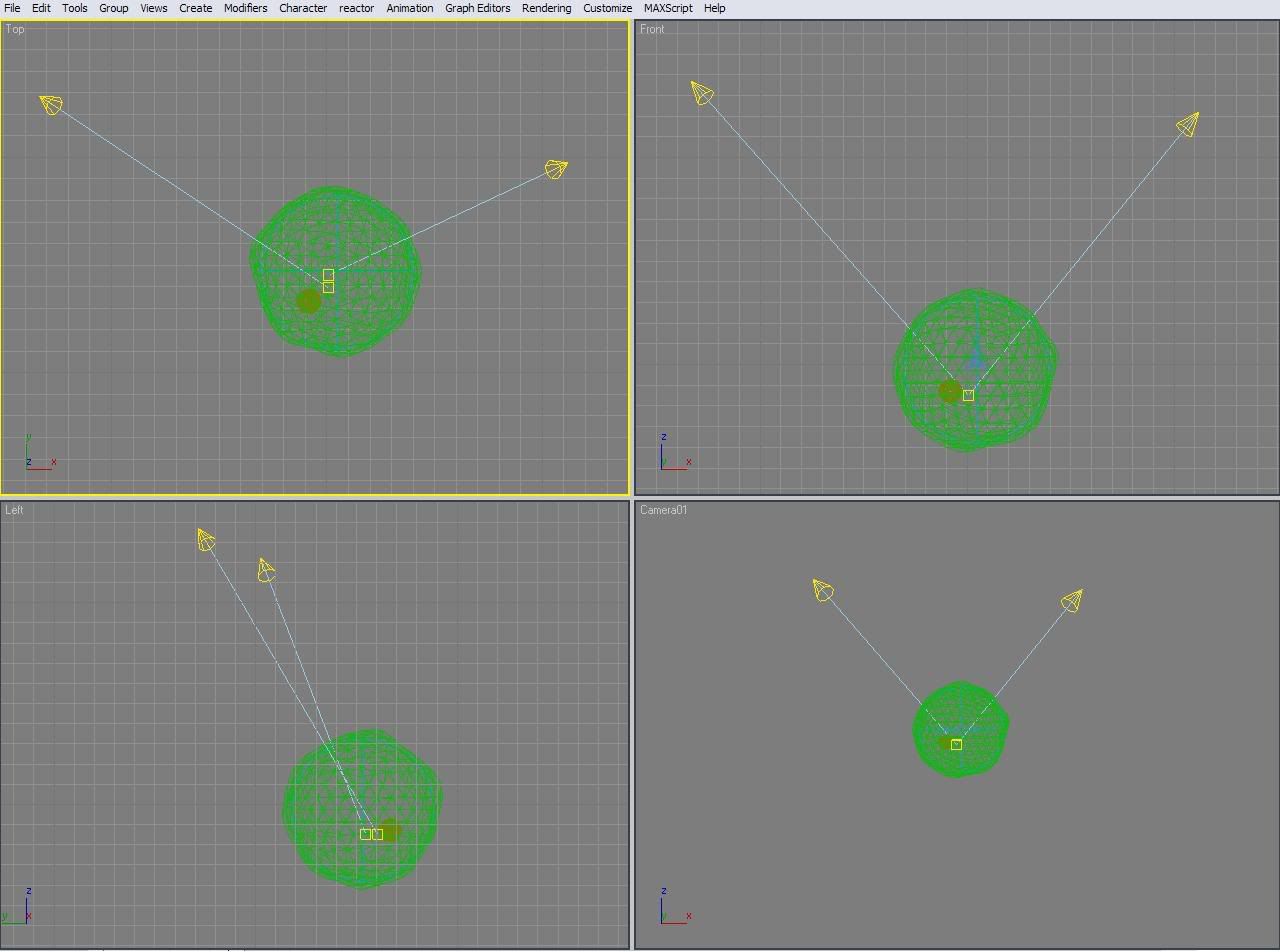
first pic is here! if you're curious, it's the setup of the scene. 3ds max was in expert mode, to give the maximum size for each seperate frame. The lights are rather obvious, the perspective viewport is set to the camera in the scene, and the green sphere is the cell, with the brown-ish sphere inside it the neucleus. I posted a link instead of a picture, because the pic's size messes with the formatting stuff used in forums and such.

scene layout
top-left: top view
top-right: front view
bottom-left: side view
bottom-right: camera view (default is perspective view)


a view of the cell

Image


the end frame

Image


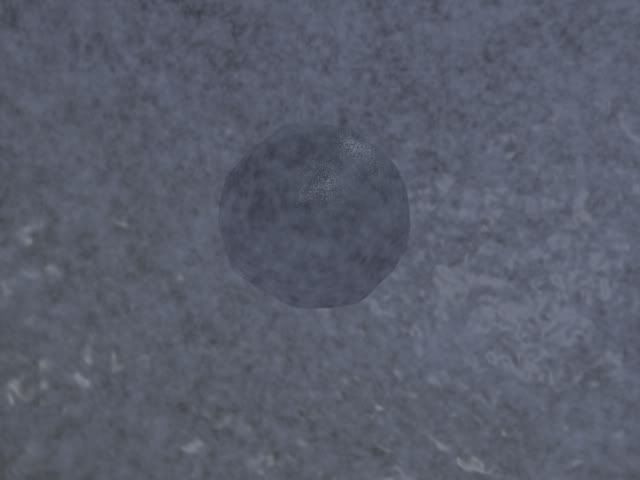
long-range shot of neucleus (really shows off fog)

Image


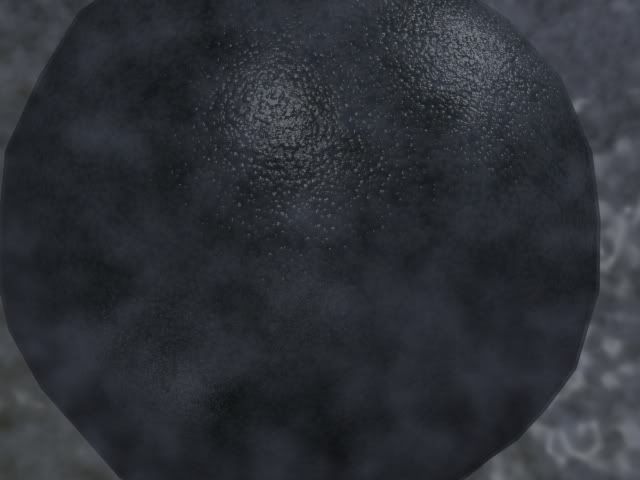
medium-range shot of neucleus

Image


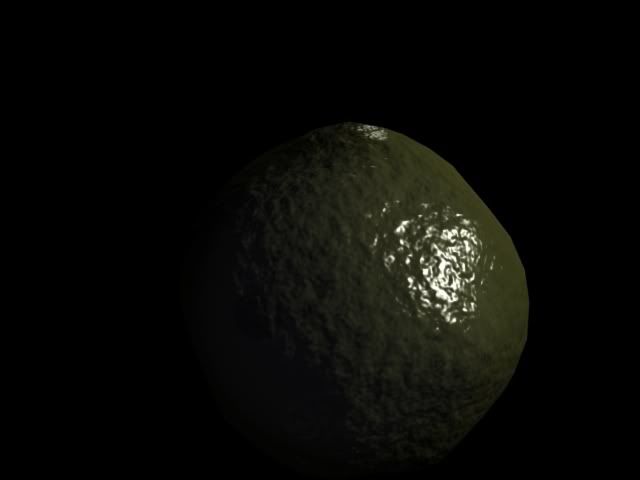
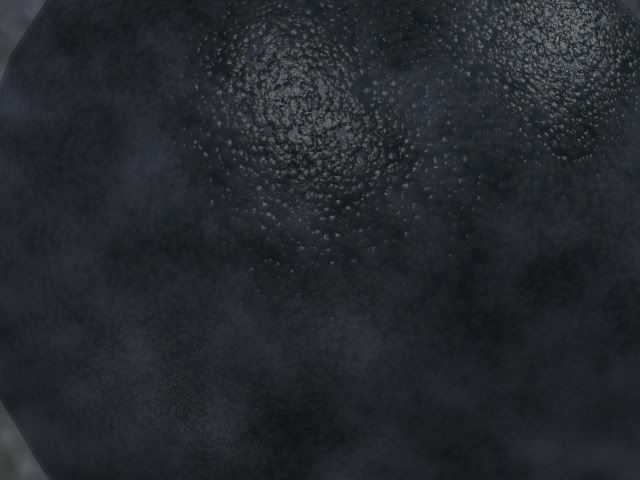
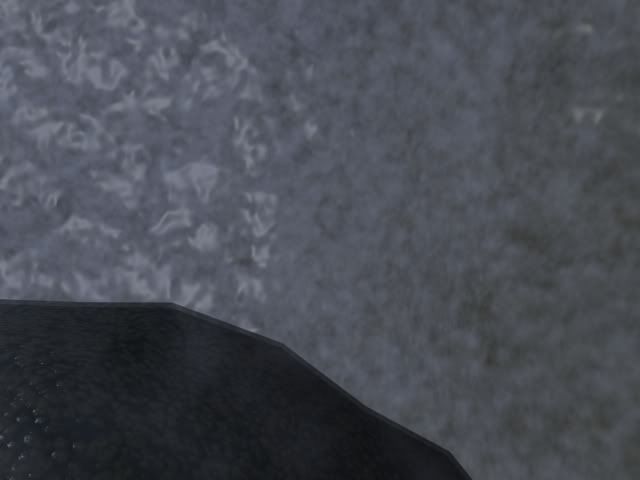
close-up of neucleus (sexy bump-map, eh? :wink: )

Image


a pic inside the cell, with part of the neucleus. mainly to display fog stuff

Image


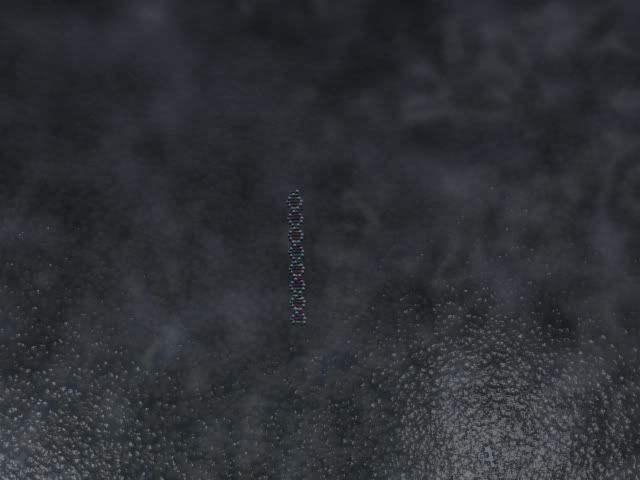
long-range shot of DNA, including nice angle of the bump map inside the neucleus.

Image


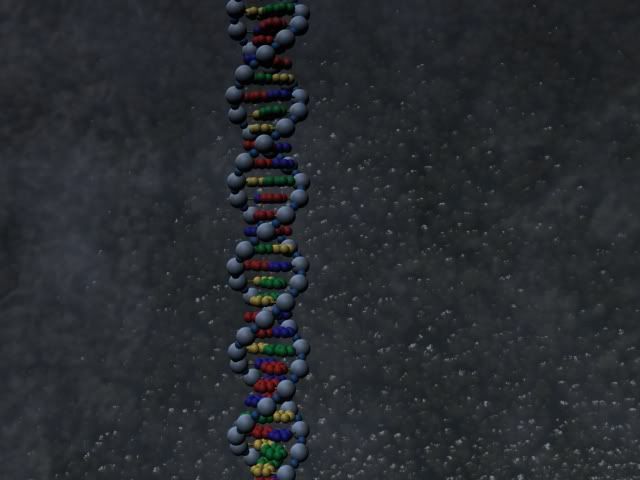
mid-range shot of the DNA. of the 399,000+ polys, over 90% come from the DNA.

Image


sorry, the animation is just too big to host on the internet (as long as i have no access to an ftp server) if any of you want to lend me about 1.03 GB of space on your own ftp server, i'd be glad


~ the stats ~

30 second animation, 900 frames. starting rendering the animation at 5:55 central, took a call of duty break at 8:30 about, and will resume animation rendering before bed. as of now, estimated rendering time is about 5 hours, but if my pc hasn't been on for the past 4 days, it'd probably be a bit quicker.

a 10-second test animation i made was 118 megs, so this one is definitely going to be over 200.


general info:

399,720 seperate faces
964 objects
fastest frame render time: 2 seconds
longest frame render time: 1 minute, 30 seconds
total animation render time: between 5 & 9 hours
animation .avi file size: 1.03 GB


pc stats:

AMD 64 3200+
768 MB DDR-RAM
x800 12 pipeline PCIe x16 video card (although i don't really think it's being used)


~ the making ~

i started with 20 rectangular boxes, to be used as the main frame for the DNA. every other one would hold the deoxyribose sugar, and the ones in-between hold the phosphate groups. so i got started on the main part, the deoxyribose sugar.

i made a (relatively) large sphere for the sugar molecule. Then, created a hexagon and pentagon to be used to place the actual bases. i placed spheres on the corners of the shapes, and after 20-30 minutes of tweaking, had my first base pair, all nice and color-coded. after that, it was just a matter of copying it, rotating it, and changing some colors.

so once the base pairs and phosphate groups were made, i just attached them to the boxes, and rotated the boxes to 'twist' the 'ladder', every box being rotated 18 more degrees than the last. Once i had a good 10-base model going, i copy & pasted it into 40 base pairs, the same sequence of 10 repeating 4 times.


ok, so the boring parts over with. the DNA's made, and it's decent, but i decide to dress it up some more.

i make a cell using a large geosphere. then i apply a displacement map, to give it an irregular appearance, and a bump map, for that extra bit. then i made a copy, scaled it down, and flipped it inside-out, so that i had an inside and outside of a cell. i repeat the steps with some slightly different displacement and bump map settings for the neucleus. then made a volumetric fog effect for the inside of the cell.

then i merge them all into the same scene, add 2 target spolights, create a camrea and animate it, and then all i have to do is save the animation, and i'm done.
ASPARTAME: in your diet soda and artificial sweeteners. also, it's obviously completely safe. it's not like it will cause tumors or anything. >.>
always remember: guilty until proven innocent
babelfish


Posts: 470
Joined: Fri Sep 16, 2005 5:30 pm

Post by babelfish »

Over achiever? XD
Nice work it's cool :)
I am the 14,229th member to register at halomods. And 14229 is my lucky number.
User avatar
[cc]z@nd!


Literarian 500

Posts: 2297
Joined: Tue May 04, 2004 1:52 pm
Location: michigan

Post by [cc]z@nd! »

thx


yeah, i over-achieved... but i got an A, and i had a bunch of spare time on my hands anyways. besides, it was at least practice w/ 3ds max.


BTW: i have a MUCH smaller video on my hands. the animation was reduced from 1 GB to 5 MB while editing at school. after some tweaking, i'll host it somewhere for download, for all who care.
ASPARTAME: in your diet soda and artificial sweeteners. also, it's obviously completely safe. it's not like it will cause tumors or anything. >.>
always remember: guilty until proven innocent
User avatar
Malf


Mad Hatter Snitch!

Posts: 390
Joined: Sun Apr 18, 2004 11:50 am
Location: The Best

Post by Malf »

I think you should try rendering it with a lighter background.
User avatar
Cuda


Grunge

Posts: 5725
Joined: Tue Oct 18, 2005 2:59 pm
Location: Torrance, CA

Post by Cuda »

your teacher's gonna love this...
Image
User avatar
BEEF!!!


Pyre

Posts: 1496
Joined: Wed Nov 05, 2003 5:47 pm
Location: Berlin, MA

Post by BEEF!!! »

One time I made a 3d model of an atom and I got 10 points extra credit XD.
User avatar
[cc]z@nd!


Literarian 500

Posts: 2297
Joined: Tue May 04, 2004 1:52 pm
Location: michigan

Post by [cc]z@nd! »

extra credit... always helpful.

and here's my mini-tutorial on how i made the diffuse and bump maps on the neucleus, which happens to be my favorite part, maps-wise.


[ ~ PART I ~ ]

for part 1, just get some sort of object set up. square, teapot, whatever. we'll be applying the maps to it. To get a real good view of your bump maps, i suggest setting up a target spot light pointing to the object, and far enough away so the light covers the whole object.

strike the "M" button to bring up the material editor. then, before you do anything, scroll down to the "Maps" section and expand it (by clicking the "+" sign). When you see "Bump", check it's checkbox to it's left, and click the button that says "None". For the Neucleus, i chose "Cellular", but noise , checkered, and waves work well too.

The cellular map's properties, that i have, are all normal in the "Coordinates" tab. the only stuff i touched was in the "Cellular Paramaters" tab. in there, i left the color as-is, but changed the following things:

"Circular" radio button checked. "Fractal" box checked.
Size = 1.5
Spread = 0.5
Bump Smoothing = 0.15
Iterations = 3.0
"Adaptive" box checked
Roughness = 0.0
Thresholds:
-Low = 0.0
-Mid = 0.5
-High = 0.94


once i set that, i took a screenshot of the object from it's side, so i could see it's shaded half, the lit half, and everything in-between (which will give me the most info about the bump map, so i can make better adjustements).


[ ~ PART II ~ ]

Alright, now that you've got a nice bump-map, it's time to add some color. I wanted something that looked like a neucleus (basically just wanted to make it organic, so dark blue/green/brown colors are good). but, to get it to match the effect, it needed to be a cellular map. so, i hit the "back to parent" button, scrolled up, and clicked on the box next to "Diffuse".

Now, for my purposes, i used a mix map to soften the cellular map's color. here's the mix maps settings:

Color #1
-Red = 0
-Green = 20
-Blue = 45
-Hue = 151
-Sat. = 255
-Value = 45


Color #2
-cellular map, more on that now...


Mix Amount = 10.0


Mixing Curve
-"Use Curve" box is checked
-Upper = 0.22
-Lower = 0.0


Now, to make the second color to be used in the mix map. click the box labeled "None" and select "Cellular". Now, set all of it's settings identical to the cellular map you set to be the bump map, this way, the color in the cellular map will match the bump map.

here's my cellular map's color, but you can do basically what you want with it. (remember, the top color is the high points, the middle color is the middle area, and the bottom color is the "base" color)

Cell color = a brown/tan.
Division color (top one) = a dark brown. darker than the cell color.
Division color (bottom one) = an almost black brown, darker than the first dividsion color.

and those are the map settings for my Neucleus! Also, using this tutorial, you can get a feel for making bump maps using only 3ds max, which can be useful for adding a touch of realism to objects without adding any more faces, or using another program.

but there's good tutorials out there for using bump maps made from images. i couldn't find any immediately, but basically, here's what you would do to get a brick texture and brick bump map.


1: get a brick texture

2: apply to brick texture to your object (as a diffuse map)

3: open up the brick texture in photoshop (or something of the like) and change it to a monotone bitmap. since we want the mortar between bricks to be pushed-in, we want to make sure it's darker then the bricks. if it's not, invert the colors. (even paint can do that)

4: save the monotone brick texture. then, apply it to your model as a bump map, and adjust it's strentgh to your needs.
ASPARTAME: in your diet soda and artificial sweeteners. also, it's obviously completely safe. it's not like it will cause tumors or anything. >.>
always remember: guilty until proven innocent
Post Reply