--------------------------------------------------------------------------------
Let me explain what a multipurpose does. In general, it determines the "shiny-ness" or detail level of your skin. Here is the color code:
-Blue is shiny
-Red/Purple is detail
-Green is lights
So after you have a skin, you would like to select those specific parts and color them according to the code ^ ^ ^
The reasons you really should use photoshop are as follow:
-It has tools that can accurately select parts of a picture
-It has tools that can accurately select and alter COLOR of a picture
-It has features (layers, paths) that allow your skin to remember what you selected.
And after learning how to use these tools, you can easily edit both normal skins and multipurpose skins.
Here are the tools you wanna know (Warning: Long List):
-Brightness/Contrast: can really alter an image, so DO NOT OVERUSE...located at Image>Adjustmants>Brightness/Contrast...
-Selective Color: my favorite tool... can change the color of a selected area by selecting certain colors and changing them... for example:
In this picture, I want to make the Assault Rifle handle/blue rubber-plastic stuff tan/yellow for a desert mod, lets say...
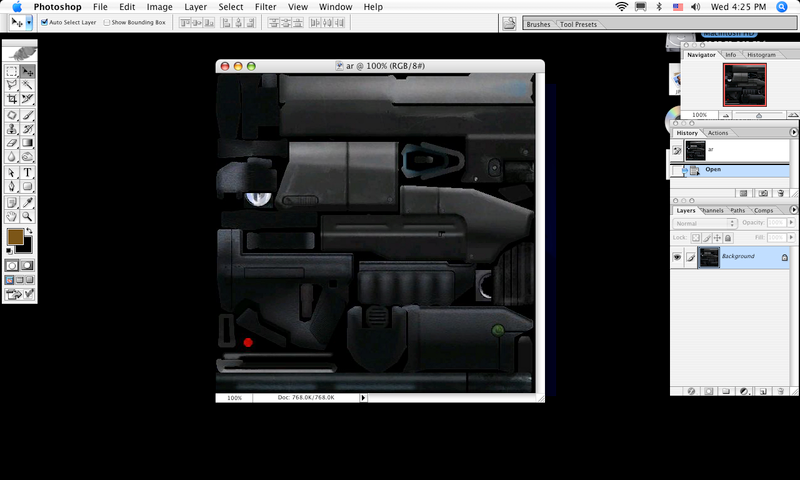
I can use selective color to do so... after selecting the parts I want to color (show you how to later...) I use selective color and turn blue/gray into yellow/white...
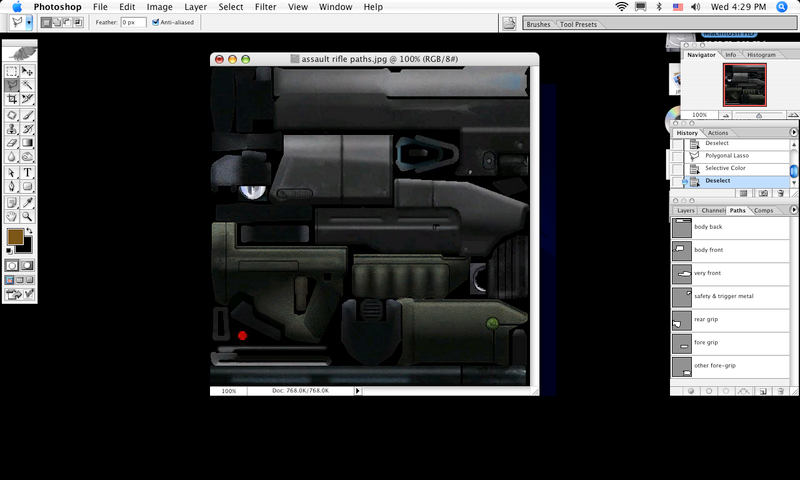
Or green, oh well, you get the point. You can specify what colors you want to change (Reds only, Blues only, Magentas only) but the one you will probably use most is the Neutrals. Changing this changes about all of your selection to a certain color, so be careful...
Selective color is located at Image>Adjustmants>Selective Color
-Hue/Saturation: Another way to edit color... saturation basically makes it bluer, I'm not sure how Hue works... changes the color lol...
Hue/Saturation is located at Image>Adjustmants>Hue/Saturation...
-De-saturate:Takes color out of an image basically... and along with Brightness/Contrast, it is very useful for creating Alphas... De-saturate is located at Image>Adjustmants>Hue/Saturation...
-The Magic Wand: very quick and useful tool, it selects parts of a picture based on color... for example, you can select a blue area and the wand will select all the blue in it. The amount of area selected is based of sensitivity, which can be adjusted at the top of the screen when the wand is selected... the higher the sensitivity, the more area is selected... 30-40 is usually the average for me...
The wand is located on the left of the screen in the tool bar...
-The Lasso Tool: another method to select an area. Either you can draw out the selection freehand, or you can have it "attract" to surfaces...
I never use the traditional lasso tool, because it is hard to draw straight... but I do use both Polygonal Lasso and Magnetic Lasso... Polygonal Lasso is also freehand, but it is made in straight lines. This is useful for selecting certain areas quickly and without the need to be precise...
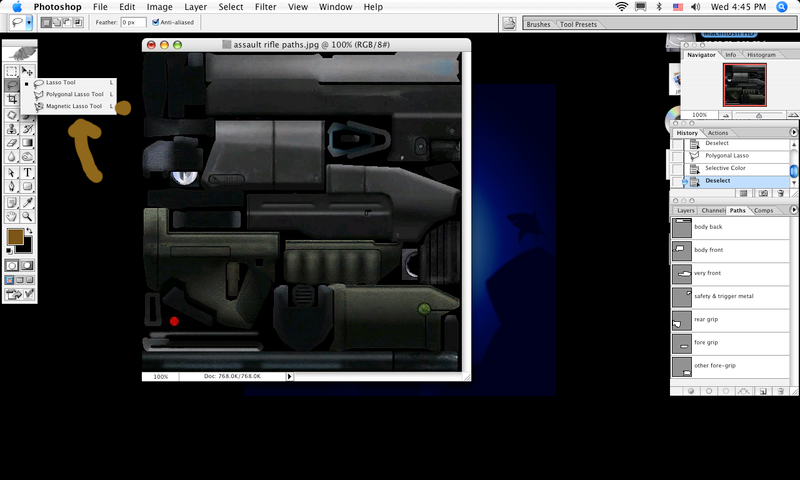
Magnetic Lasso is more precise than both of the other Lasso's... It attracts to "surfaces"... let me show you:
I select the Magnetic Lasso...
It's easier to demonstrate on a simple object, so I will show you on a brown circle... see how it "attracts" to the object and creates its own anchor points...
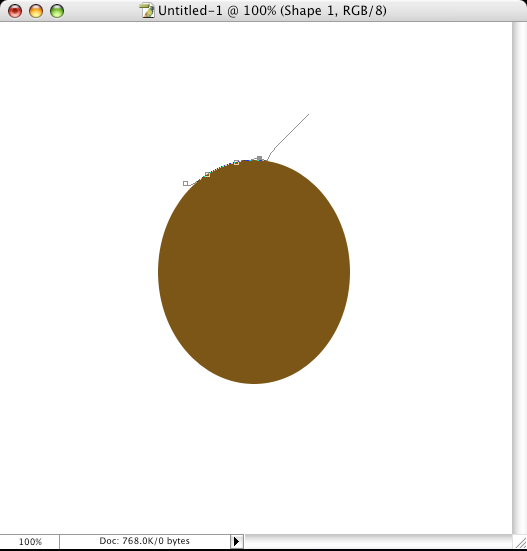
All I did there was select where it started and dragged near the circle; the tool did the rest for me...
The Lasso is located on the left of the screen in the toolbar (see picture)
The Lasso is useful, but it can be inaccurate, no matter how hard you try not to be... because of this, I present:
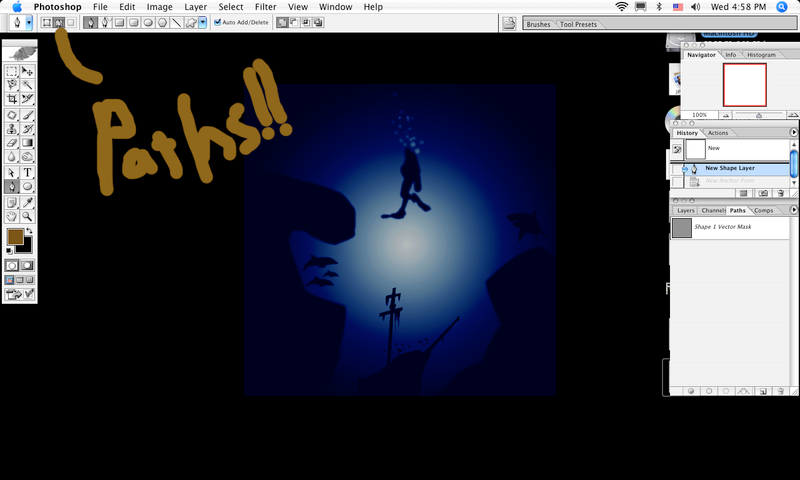
-Pen Tool: The most pain-in-the-ass tool on the program... takes hours of practice... it is all freehand, and with it, you can select parts of a picture by using vectors and anchor points...
first, let me explain a path: a path is the outline of a shape... basically... you draw one by creating a start point, wrapping it around what you want, and connecting it BACK to the start, creating a shape... in fact, you can create your own shapes using this tool and save them into photoshop, which you can draw at any time!
Anyways... the pen draws them out... but it is not easy to do so, so let me show you how:
When you want to draw a shape or outline one, select this:
The direction and arc of the line you want to draw is relative to the pick-up path you draw...
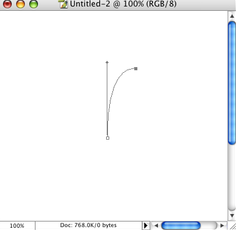
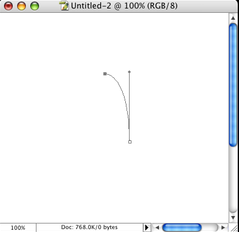
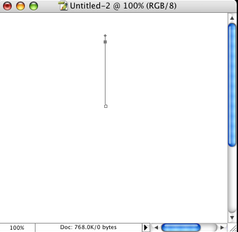
The last one is a straight line... In order to draw straight lines, you add the new anchor point on the pick-up path (click the button on the line)... You draw pick up paths by option-clicking on the anchor point for mac users(i think it is ALT for PC users) and then dragging it to wherever you want...
Practice alot with this tool, it is very useful... ALSO, when creating a path, you are much more precise when you are zoomed in... just hold option (ALT I believe for PC) and roll the mouse up or down...
The Pen Tool is located at the left on the toolbar (see pictures)...
Those are about all the tools you'll use to create a multipurpose, but now, I wanna talk about Layers and Paths... You can choose to show either Layers or Paths by selecting their tabs in the bottom-right corner of the screen...
As I explained above ^ ^ ^, Paths are the outline of a shape, and they behave differently than layers in that:
-They are invisible
-Paths select a bit differently... you'll understand soon...
After you draw a path, you wanna save it... do this by double clicking on it in the Paths tab... once done, you can either:
-save the path as a custom shape
-create a selection
To save the path as a custom shape, select the path and go to Edit>Define Custom Shape...
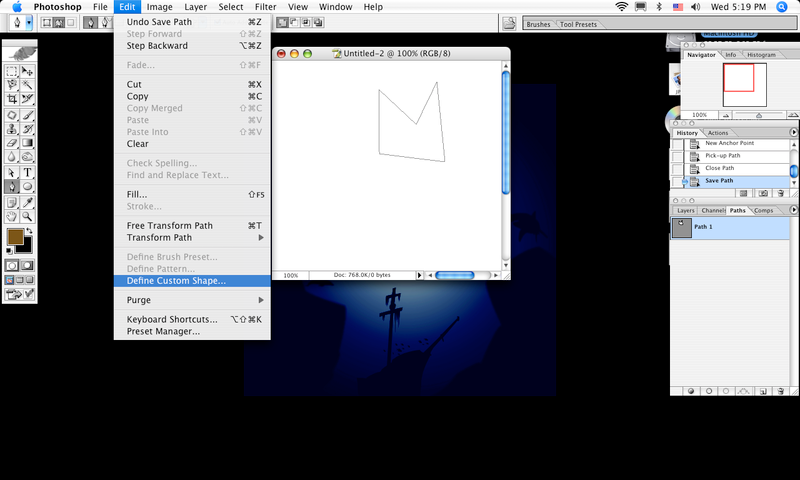
Now, whenever you go to create a custom shape, you can select this...
And to create a selection, right-click on the path in the Paths tab and click "Make Selection" (as your path outlines what you want selected)... this will create your typical photoshop selection, but very accurately!
And Layers... Layers are similar to paths, but they take up the whole document... some parts are visible some parts are not, and based on how you order them, you determine what is on top of what...
Example: I want to put my circle on a blue background (BTW, when creating shapes, don't forget to put the option from Paths back to Shape Layers on the top toolbar):
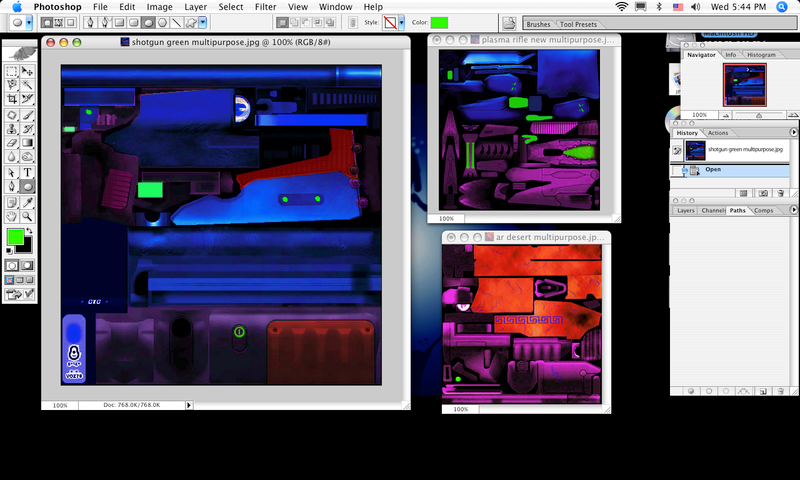
All I have to do is take the circle layer and put it on top of the blue layer... I can do this by right-clicking on the circle layer, clicking "Duplicate Layer", selecting what image I want it to duplicate to, and tadaa:
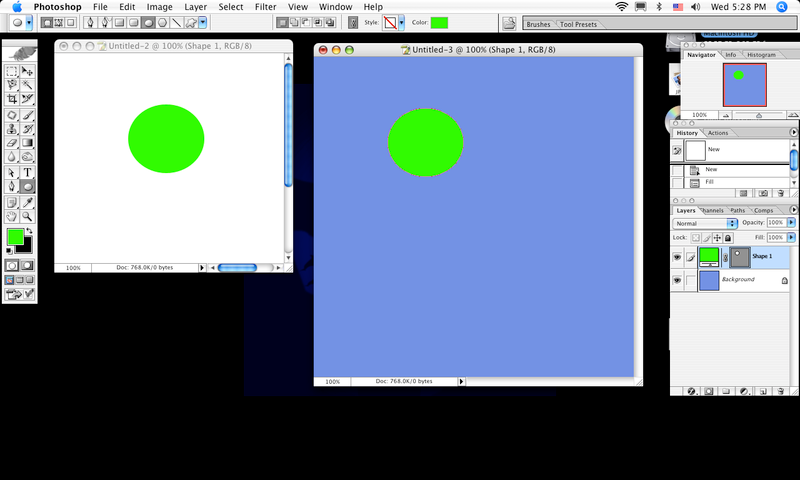
Always create lots of layers when creating/editing skins, and ALWAYS SAVE IN PSD FORMAT (until you are going to import the skin)...
Finally, at the part of editing multi's... you use all of these tools in creating skins, and just about all of them in creating multi's also. But there is a specific order in which I create multi's... it goes:
1. Select the parts to edit
2. Save the parts as paths and/or layers
3. Edit them
4. Use the paths and layers to easily and accurately color the parts of the skin.
5. Save as .psd
6. When finally ready to import, convert to .dds, .jpg or w/e
Use the pen, lasso, and wand tool(s) to select the parts to edit
I will now skip to the multi process by using a simple AR skin
Here, I selected the AR's Metal by using paths...
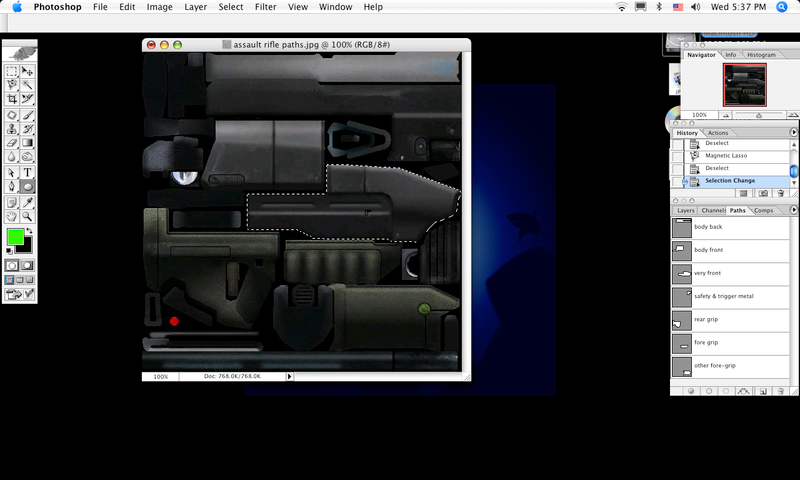
Now, I want to make it shiny, so I'd color it blue correct? Correct:
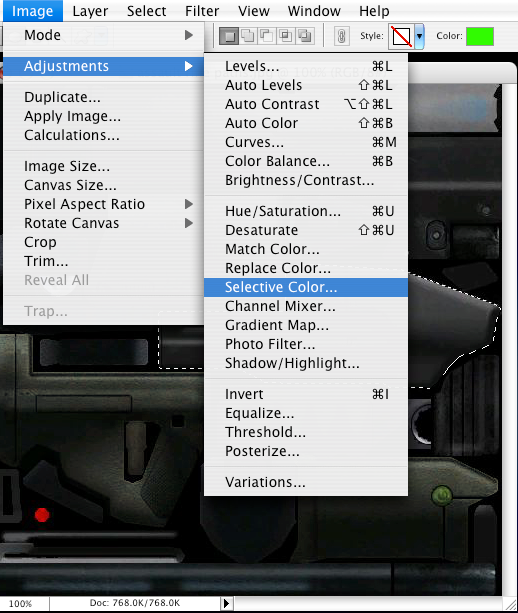
Using the selective color tool...
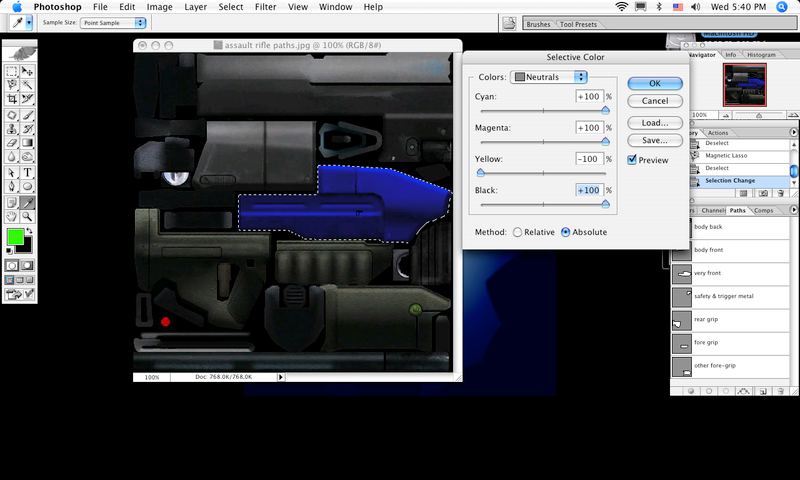
And there ya go...
Now just repeat the process using other colors and you get a rainbow-y, but very accurate and detailed, multipurpose skin:

Few examples there...
By using layers and paths, you don't have to select what you want to edit every time you want to edit it... this makes it very very very very VERY easy to skin...
That is about it... if I remember anything, I will update it...
Also, to those who know PS better than I do: if I called something an incorrect name or something, you can correct me, idc.
Also x 2, thank you Pepsi for showing me some of this material in your tutorial... I suggest everyone goes and reads that one too...
Edit #1: Wanted to add something... new skinners, you need to go online and learn how to make your own textures... there are alot of tutorials and websites with this info... here is one: http://www.good-tutorials.com/


