HaloPC: Simple Skin Tutorial
Posted: Thu Oct 27, 2005 4:00 pm
this tut is for the n00bs out there who wanna get started on making skins
things you will need
1. a decent comp
2.hmt http://files.halomods.com/viewtopic.php?t=4198
3.photoshop cs2 or any other version http://www.soft32.com/download_346.html
4. some common sense sry no link lol
5. the dds plugin for photoshop http://files.halomods.com/viewtopic.php?t=463
6. the .net frameworkhttp://www.microsoft.com/downloads/deta ... laylang=en
ok now that you have that stuff its time to get started assuming you installed everything.
step 1. put the dds plugin in your plugins folder
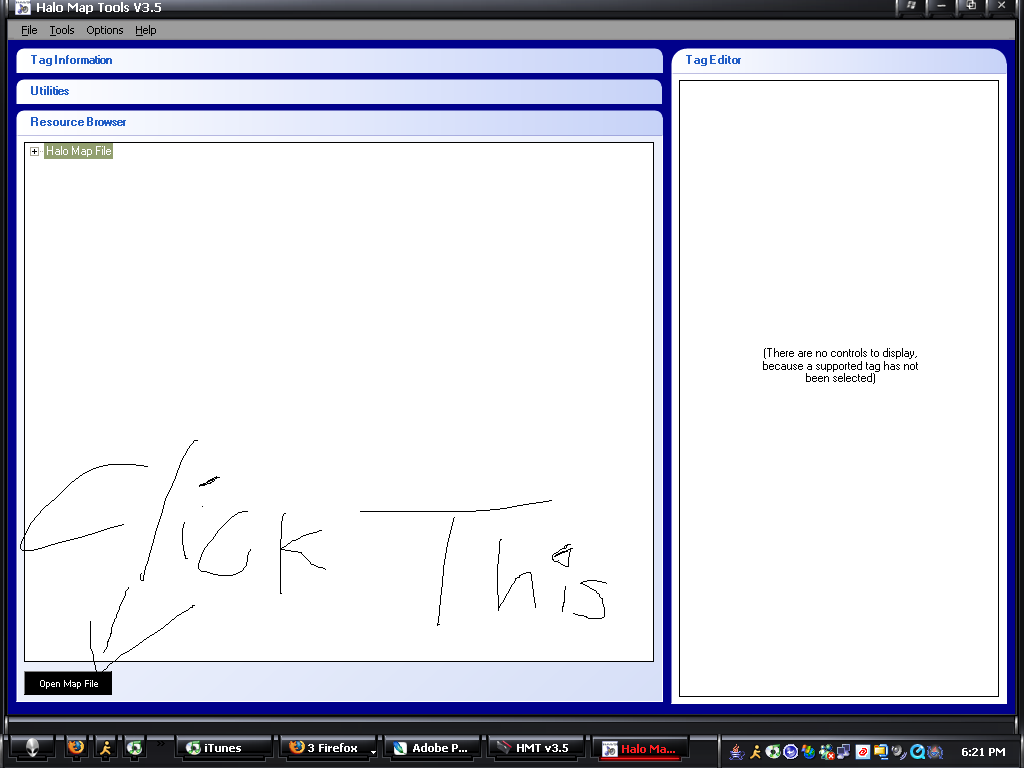
step 2. go to hmt and open a map we will be using bloodgulch
3. go to the bitmaps section and open it. Find the object you want to skin we will be using the banshee and click the save texture button and save it in whatever you like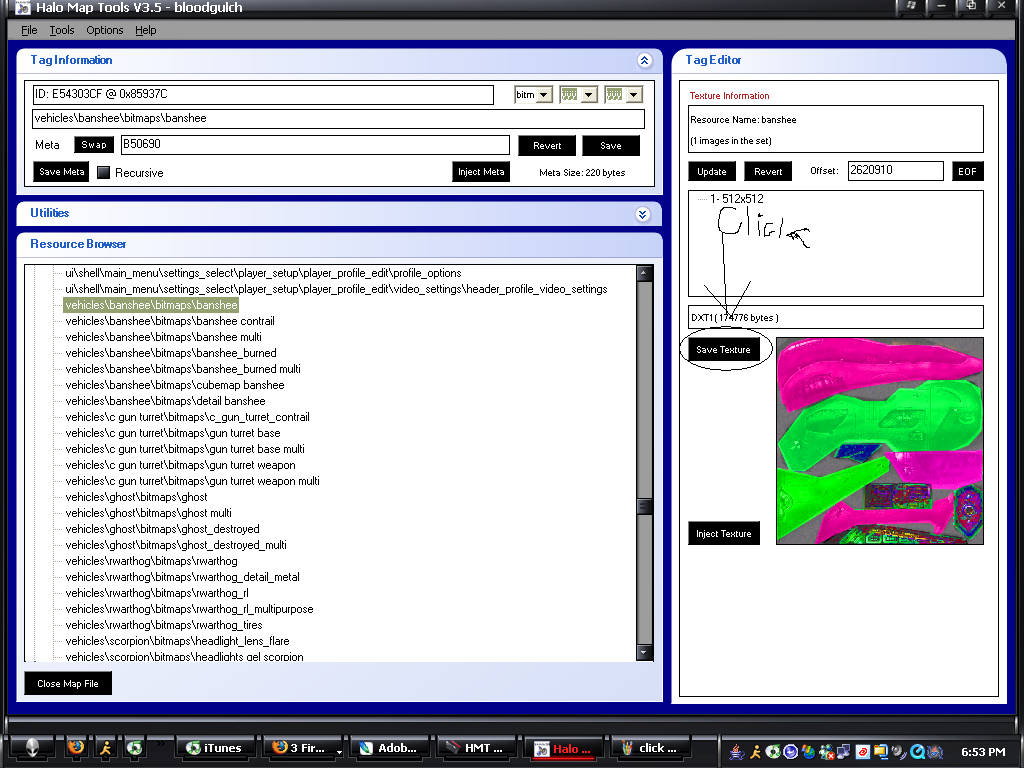
step 3.open the .dds file with photoshop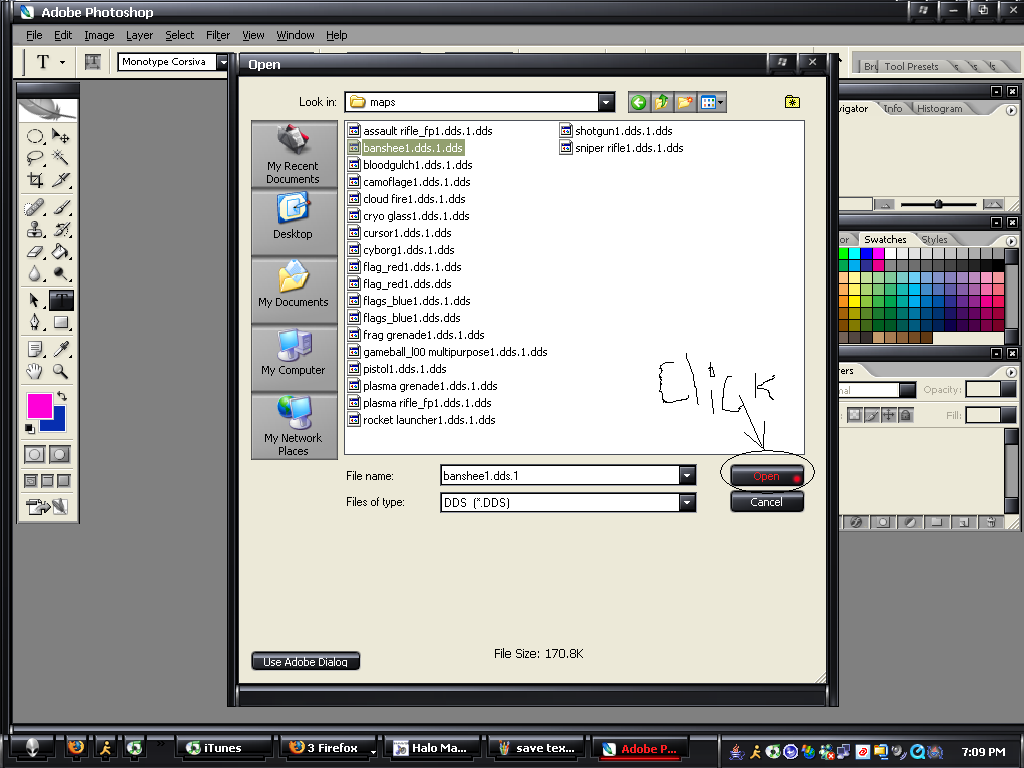
step 4. when a box pops up asking you if you want ps to display the mipmaps click no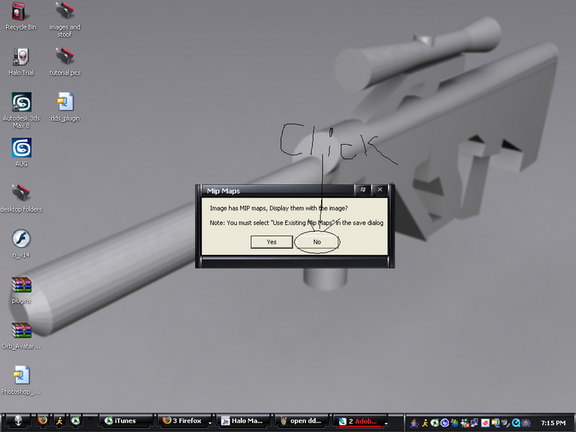
step 5. select the polyganol lasso tool it may be behind your lasso tool in that case hold down the mouse on top of the lasso tool and wait for a list to show up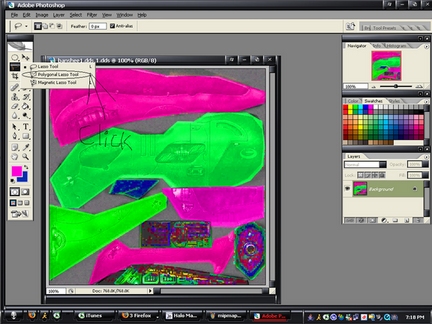
step 6. select the part you want to change by clicking in key spots around the section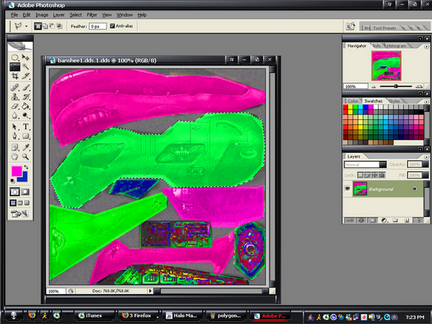
step 7. hold down ctrl +alt and hit "u"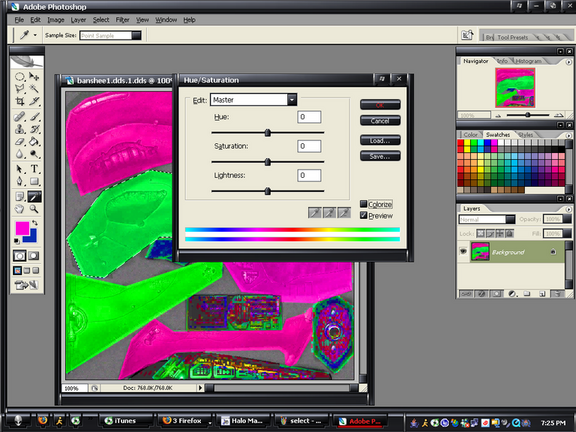
step 8. check the colorize box and mess with the hue saturation and lightness until you get a color you like and hit ok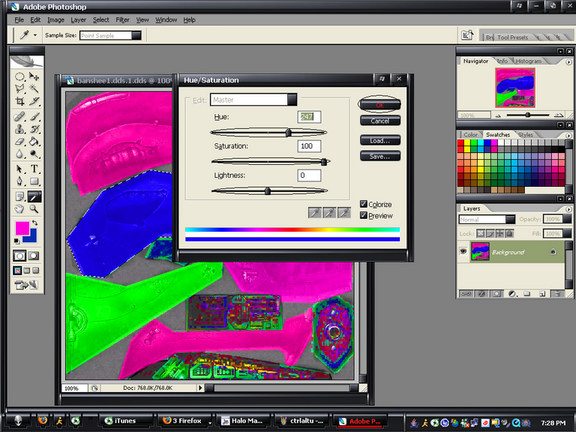
step 9.repaet until you are satisfied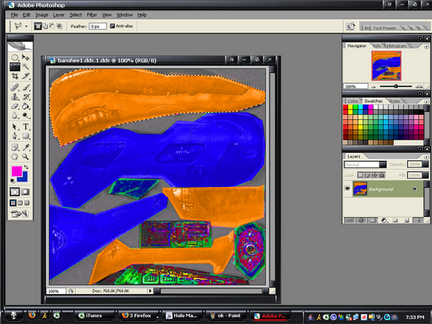
step 10. put your name on with the text tool if you want.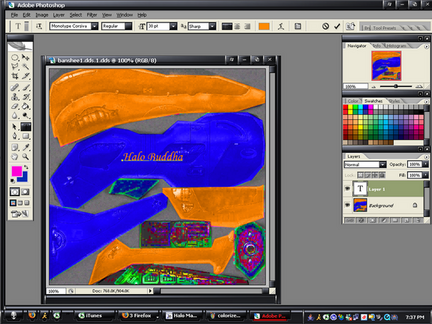
step 11.save as in a folder other than the one containing the original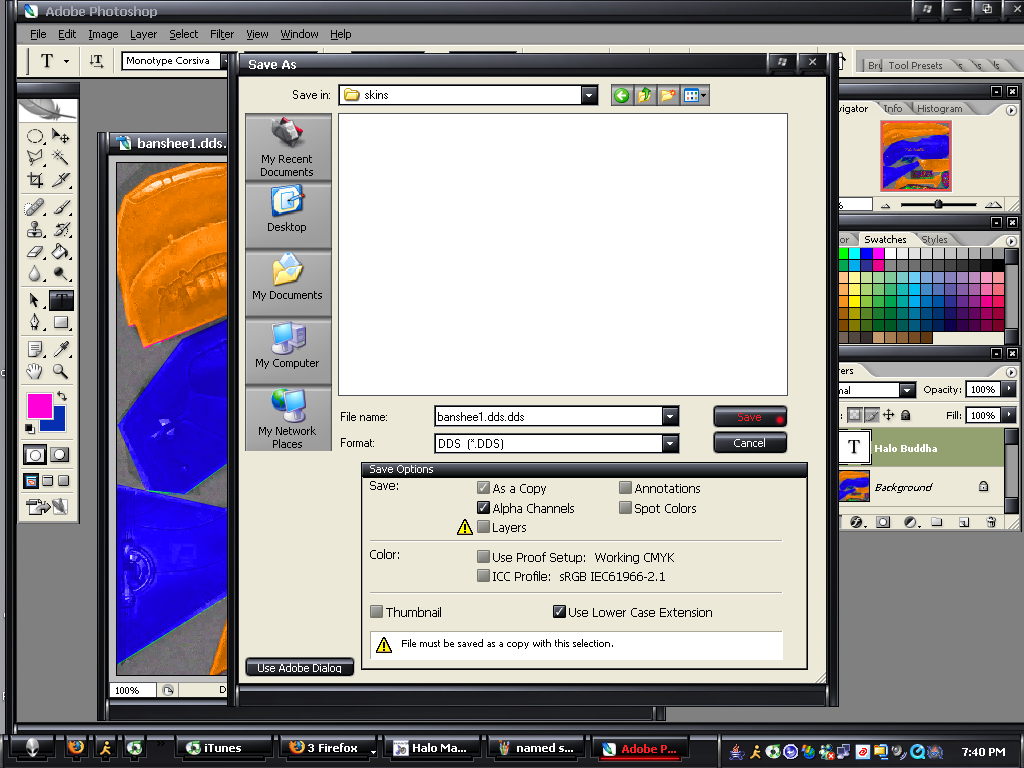
step 12. save it as a dxt1 and generate the mip maps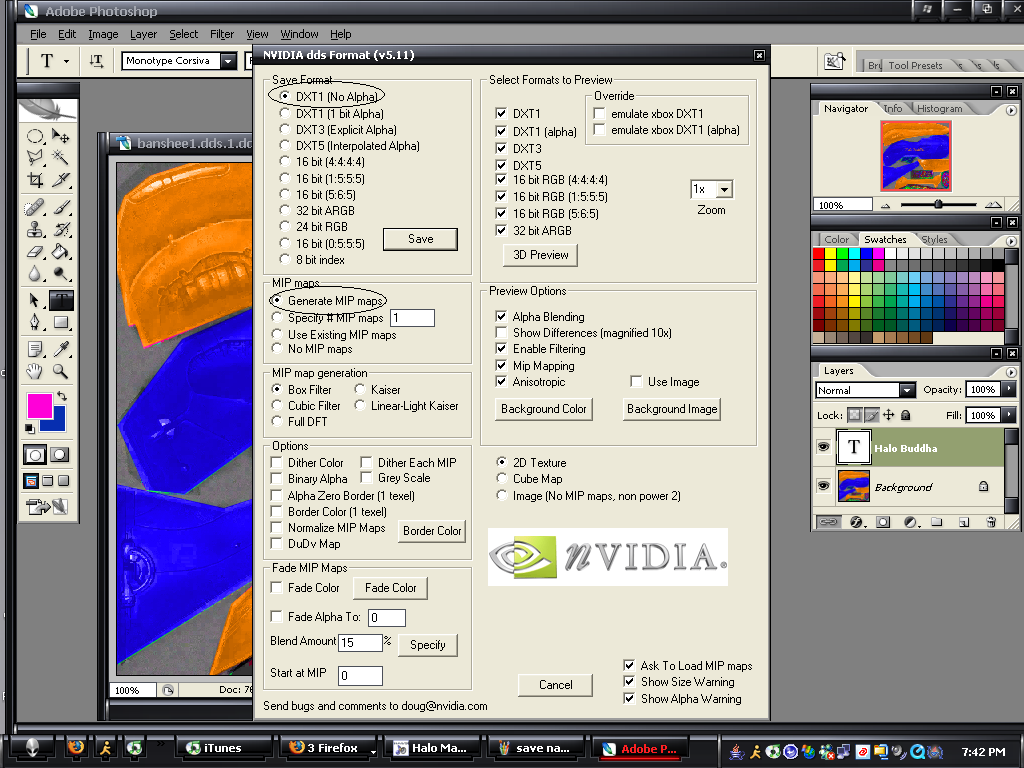
step 13. and when a box comes up and says alpha will be lost click continue or yes or whatever it says thats not cancel
step 14. go back to hmt and get your shee tag and hit the inject texture button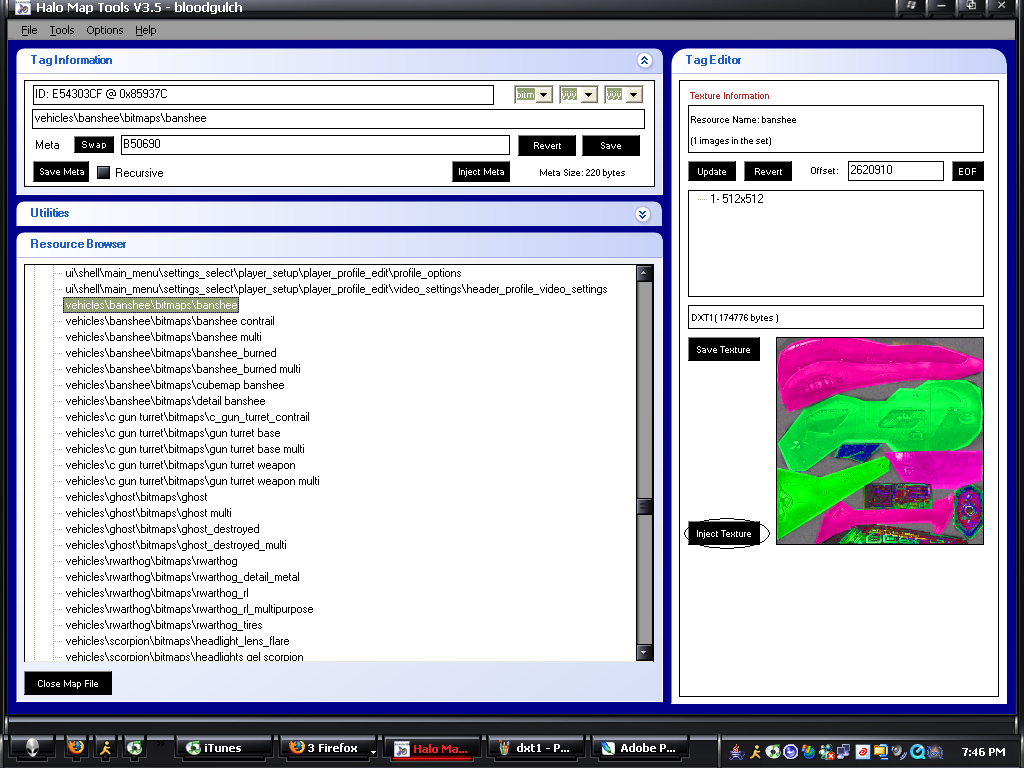
step 15. get your texture and open the file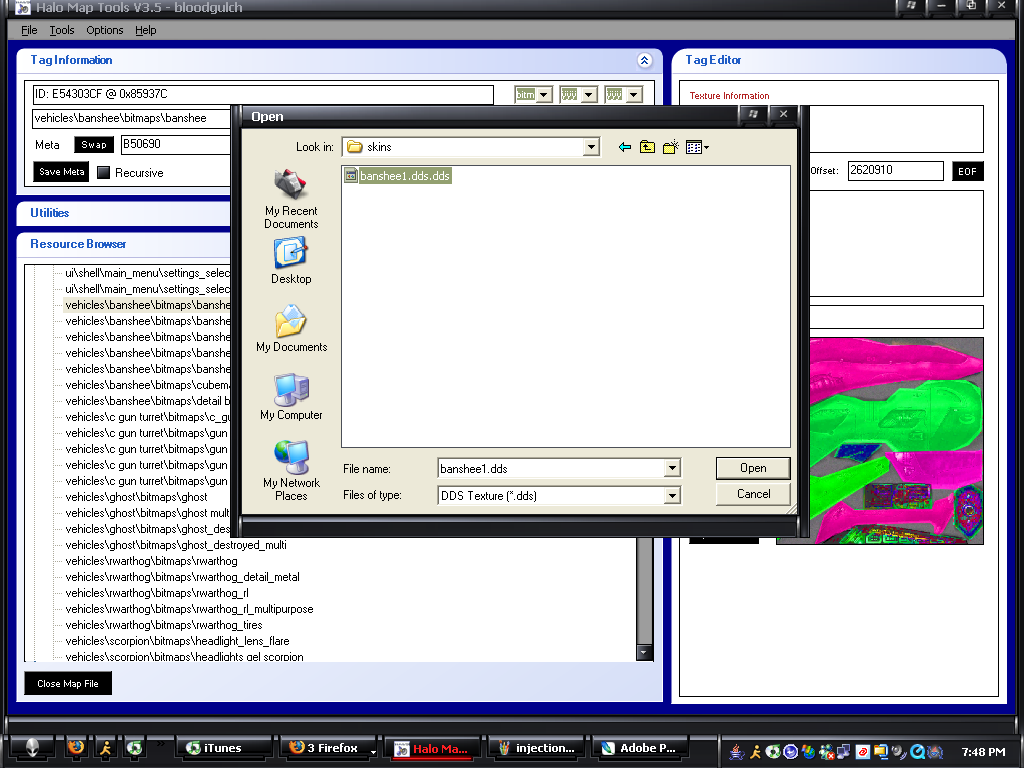
step 16. hit close map file, open halo, start a game and enjoy your skin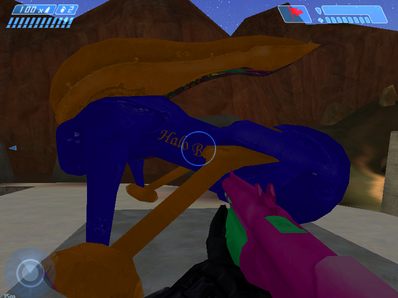
step 17. enjoy your skins!!!!!!!!!!
the reason for this tut is that when i started i could not find a straight forward tut so thats what i tried to do with this
things you will need
1. a decent comp
2.hmt http://files.halomods.com/viewtopic.php?t=4198
3.photoshop cs2 or any other version http://www.soft32.com/download_346.html
4. some common sense sry no link lol
5. the dds plugin for photoshop http://files.halomods.com/viewtopic.php?t=463
6. the .net frameworkhttp://www.microsoft.com/downloads/deta ... laylang=en
ok now that you have that stuff its time to get started assuming you installed everything.
step 1. put the dds plugin in your plugins folder
step 2. go to hmt and open a map we will be using bloodgulch
3. go to the bitmaps section and open it. Find the object you want to skin we will be using the banshee and click the save texture button and save it in whatever you like
step 3.open the .dds file with photoshop
step 4. when a box pops up asking you if you want ps to display the mipmaps click no
step 5. select the polyganol lasso tool it may be behind your lasso tool in that case hold down the mouse on top of the lasso tool and wait for a list to show up
step 6. select the part you want to change by clicking in key spots around the section
step 7. hold down ctrl +alt and hit "u"
step 8. check the colorize box and mess with the hue saturation and lightness until you get a color you like and hit ok
step 9.repaet until you are satisfied
step 10. put your name on with the text tool if you want.
step 11.save as in a folder other than the one containing the original
step 12. save it as a dxt1 and generate the mip maps
step 13. and when a box comes up and says alpha will be lost click continue or yes or whatever it says thats not cancel
step 14. go back to hmt and get your shee tag and hit the inject texture button
step 15. get your texture and open the file
step 16. hit close map file, open halo, start a game and enjoy your skin
step 17. enjoy your skins!!!!!!!!!!
the reason for this tut is that when i started i could not find a straight forward tut so thats what i tried to do with this