Things needed;
HMT v3.5 or 3.0
Method;
1.On your desktop make a folder called PMI or anything you want really.
2.In that make 4 other folders called Batch Extract,BSP,New items and Build.
3.Inside New Items make 3 more folders called Actr,Actv and Bipd.
4.Ok now open HMT,go to the map you want to inject the grunt into,i'll be using BG as an example.
5.Go to tools-extract-batch extract and click the extract metadata and click the 'browse' button and fingruntd the PMI/batch extract folder and click 'Start Batch Extraction' and when the pop up saying 'Extract BSP' pops up,click yes.
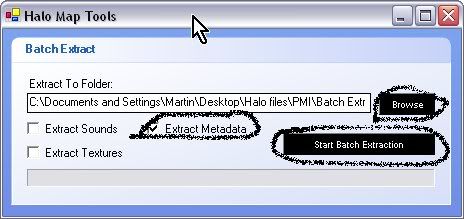
6.Then go to tools-extract-BSP/model sections and extract them to your PMI/bsp folder.(The one i told you to make at the start)
7.Close BG and go to b40.map.
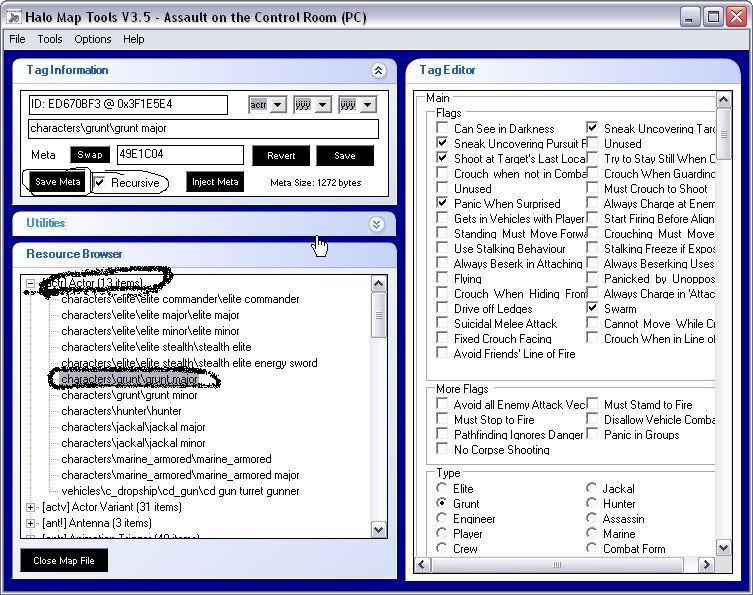
8.Go to [actr] tag and click the +.
9.Go down to 'characters/grunt/grunt major'
10.Click the 'recursive' box and then save the meta to the PMI/new items/actr.
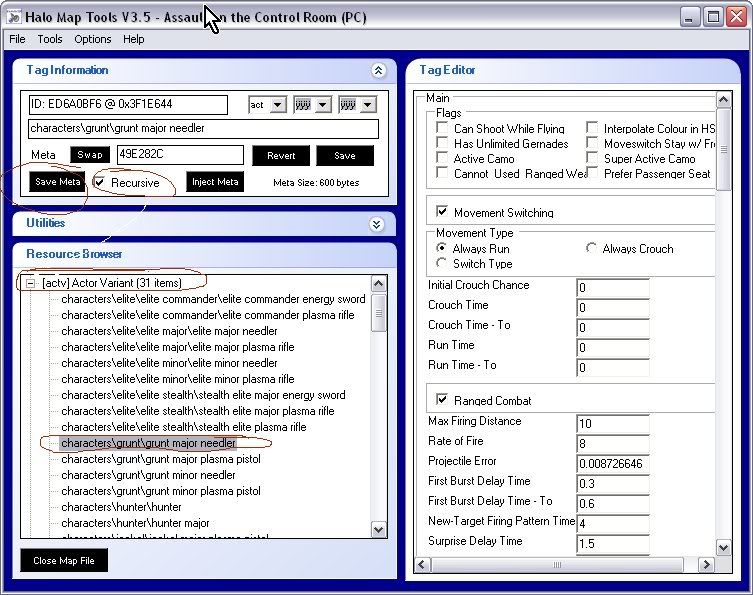
11.Then go down to the [actv] tag and select the 'characters/grunt/grunt major needler' save the meta to PMI/new items/actr.
12.Then go down to [bipd] and select the 'characters\grunt\grunt' and then save the meta to PMI/new items/bipd.

13.Then go to tools-generate raw model offset file (CSV fill),then save it to
your PMI folder.
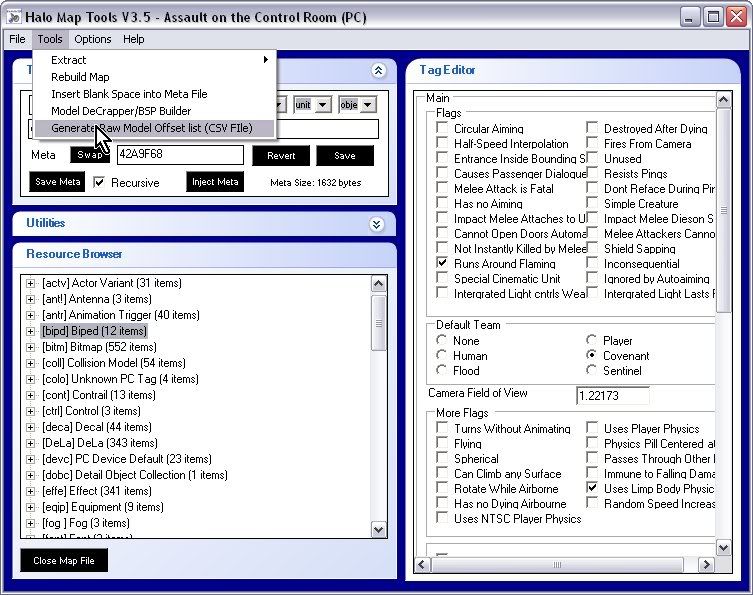
14.Go to Extract-Raw model and load up the file you just saved.
15.Find characters/grunt/grunt.
16.Extract it to PMI/new items/bipd/characters/grunt.
17.Then go to tools-model decrapper/BSP builder.
18.Then right click the blank white box and go on add,then go to PMI/new items/bipd/characters/grunt then find the grunt.mod2.meta and double click it.
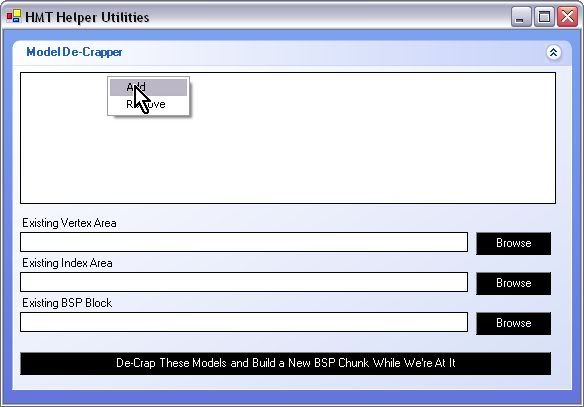
19.After that browse for existing vertex area and browse for your PMI/bsp and then go on the bloodgulch.vertices.
20.Then for the brose for existing indices area go to PMI/bsp and find the bloodgulch.indicies.
21.Then on existing bsp block browse and go to PMI/bsp and find the bloodgulch.sbsp.
22.Then click on the black button at the bottom and when it's finished processing close it and go to your PMI/bsp.
23.If there is a file sayings bloodgulch.sbsp.meta then copy it into PMI/batch extract/levels/test/bloodgulch and overwrite it.
24.After that move your bloodgulch.map file out of your halo maps directory into your build folder.
25.Copy all the files from batch extract into build.
26.Go into your new items folder and go into actr,copy all the files INSIDE actr into the build folder,click 'yes to all'.
27.Then go to actv folder and copy all the files INSIDE it into the build folder.
28.Then go to bipd folder and copy all the files INSIDE it into the build folder.
29.Then go on tools-rebuilt map in HMT.
30.Browse for the 'original map' and then go to your halo maps directory and choose bloodgulch.map(in this case).
31.Then when the message promts 'Do you want to automatically fill in the required files based on the path and name of the selected map file',click yes.
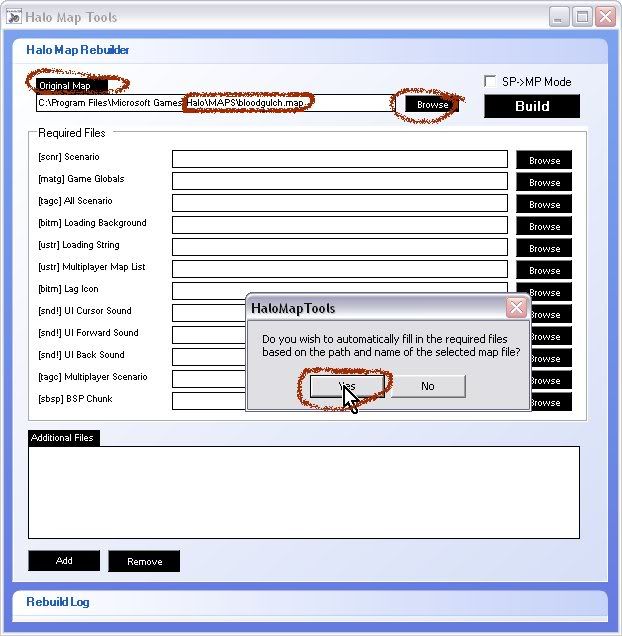
32.At the bottom of the window go to add and go to your PMI/build/characters/grunt,and then select the files inside,not folders,the meta and stuff like that file.
33.Once you've done that go to bitmaps inside the 'PMI/build/characters/grunt' file and select all the meta based files in there.
34.Then go into the shaders file
in the 'PMI/build/characters/grunt' and then copy all the files in there.
35.Then click Build.
36.When the message prompts 'Have any new vertices added to the BSP?'(I think thats what it says),click yes and go to your PMI/bsp file and choose the bloodgulch.vertices.new file.
37.When the next message promts 'Have any new indices added to the BSP?',click yes and go to PMI/bsp file and click the blooduglch.indices.new
38.When the next message comes up and says 'Modify the original offset?'(or something like that),click yes.
39.Now in your build folder there should be a bloodgulch.map.rebuild,put it in your halo map directory and then rename it bloodgulch.map.
40.Now you've done,go play your map and follow another tut on how to make the AI's do stuff.Thanks bi!