by aka Monazight
Today, I will explain how to inject FP models with Dark Matter.
While many of you know how to Model Inject, I feel that a vast
Majority of the community doesn't know how.
I believe this for one simple reason: there are very few mods with MI.
Hopefully we can change that.
This tutorial is meant to be for modders of all skill levels, and should be relatively easy to follow.
In this tutorial you will need:
Dark Matter by Pokecancer(Download not currently availible)
Insolence by tjc2k4
Ch2r by XIU
HMT 3.5 by MonoxideC
Step One: Finding a Model to Inject
NOTE: If you already have a model to inject (and it's in .obj format) then you may skip this step and use your model instead of the one we're using from Halo 1.
Open up HMT 3.5, and open up a halo 1 map file(unedited of course). In this example, we're using bloodgulch.map.
Now scroll down to either the MOD2 tag(on PC halo) or the MODE tag(on xbox halo) and open it.

You should see a list of names. These are the models. Scroll down until you see the name, "weapons\assault rifle\fp\fp" and click on it. Over on the far right you should see the words "__unnamed(0) - 1713 vertices -- 3116 indices". Click there.

Now click "Export Model" and browse for a directory to save it. Remember that directory for later.
Close HMT.
Step Two: Injection Preparation
FP models have no LODs so we don't need to worry about them.
Run Dark Matter, and open the halo 2 map(in this case, Waterworks) you want the fp model injected into. Scroll to the MODE tag, and open it. Once again, you will see a list of models. Find "objects\weapons\rifle\battle_rifle\fp_battle_rifle\" and click on it.
A window should pop up, with the model you want to replace on it.

Now click "Export."

Browse to a directory and save it.
Remember that "__unnamed(0) - 1713 vertices -- 3116 indices.obj"? We need that now. Right click on it and chose rename.
Change the name to "fp_battle_rifle.standard.standard[1][0][0].obj" EXACTLY. Once you've done that, copy the file and paste it into the directory you've just exported to. It should ask you if you want to overwrite. Say yes.
Step Three: Model Injection
Now that you have the right obj in the right place, DON'T TOUCH ANYTHING. You don't have to edit the .info file at all.
Dark Matter should still be running, so click on "objects\weapons\rifle\battle_rifle\fp_battle_rifle\fp_battle_rifle". This time, click 'Inject' and browse to the folder containing the .obj, the .info, and the other files.

You should now be prompted to save a newly compiled .meta file. Browse and save it somewhere you'll remember.
At this time, your model isn't injected, even though it is displayed in the Model Viewer. Go to Tools>Add to Map and browse for the MODE meta you just saved.
At this point you have two MODE metas for the First Person Battle Rifle.
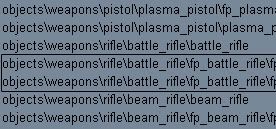
Close Dark Matter.
Step Four: Essential Model Tweaks
Run Insolence and open the map we were just working on. Open the MODE tag and find the two FP battle rifles. Click on either one.
On the right you should see a list of words. Click on Part. From there, you should see the following:
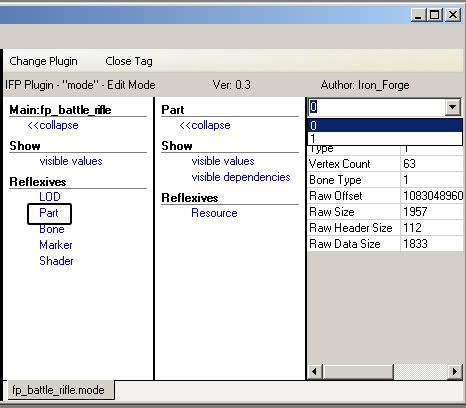
Highlight the number 0 and rename it to 1. Press enter.
You see, there are a total of two models in the Battle Rifle FP. The actual gun, and the knob. The Knob corresponds to 0, while the actual gun, is 1.
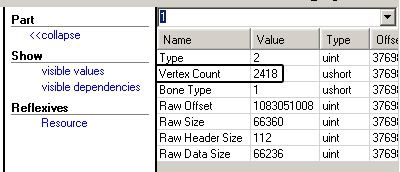
Pay attention to that number. The original Battle Rifle has a total of 2418 vertices. And the new model we've injected has 1713.
So if the number you see in that spot isn't 1713, then right click the fp_battle_rifle that you DIDN'T chose first, and click 'Rename.'
Rename it to "objects\weapons\rifle\assault_rifle\fp_assault_rifle\fp_assault_rifle."
If the number you see is 1713, then right click the fp_battle_rifle you chose first and click 'Rename.'
Rename it to "objects\weapons\rifle\assault_rifle\fp_assault_rifle\fp_assault_rifle"
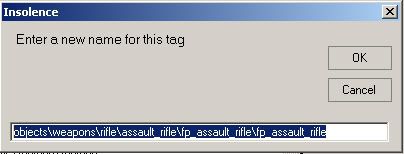
You can now close Insolence.
Step Five: Changing Dependencies with Ch2r
Run Ch2r and open the map we were previously working on.
Find the WEAP Tag and locate "objects\weapons\rifle\battle_rifle\battle_rifle" and go over to the right.
You should see a list of dependencies. Scroll down until you find two MODE dependencies (separated by a JMAD in between.)

Double click on both(one at a time) and browse to the fp_assault_rifle MODE tag you've just renamed for each.
You're almost done.
Step Six: Shader Editing
If you were to sign Waterworks, and start up Halo 2, your model would probably look something like this:
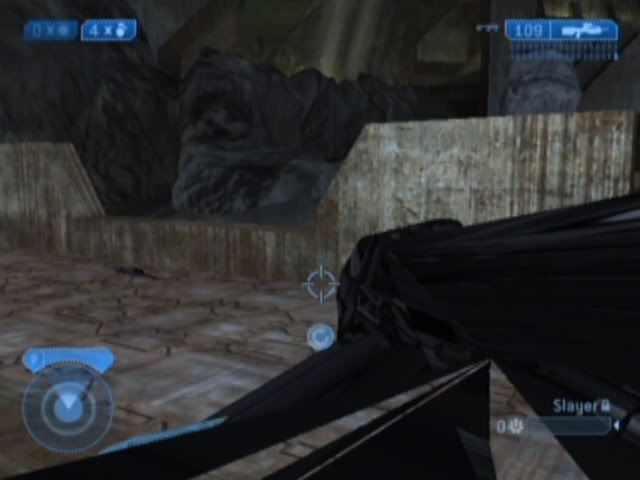
Ouch. You can kind of make out the top of the AR, but that's still not what we want.
Don't fear, you see, there is nothing wrong with the Geometry, only with the shaders.
There are two shaders that change their appearance as you turn in any direction on the Battle Rifle. It's the scope lens and the actual scope.
In Ch2r, open the MODE tag and click on your newly made model. Over on the right, you should see a list of shaders. Scroll down and find the ones named "Lens" and "Scope".
One at a time, double click on them and scroll either up or down to find "Nulled out." Once that is selected, click change.
And just for good measure, let's null out the shaders "Tens" and "Ones" as well.
Sign, and FTP.
It should look something like this:
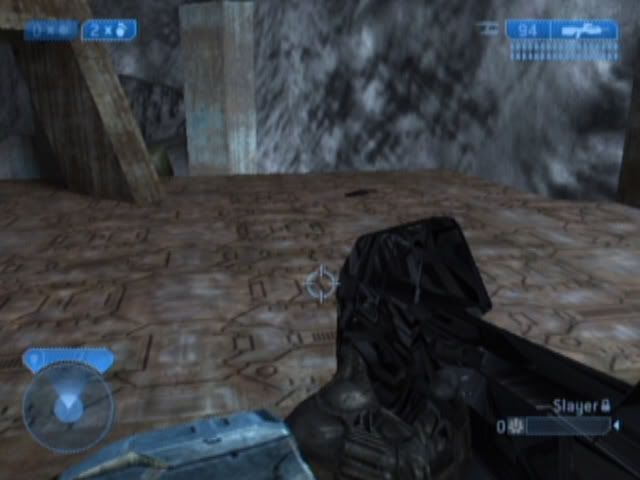
It's looking pretty good, eh?
Thank you for taking the time to read my tutorial, and keep up the modding!
-aka Monazight
PS. If you enjoyed this tutorial, please send me a PM and tell me so, with suggestions on how to improve it.
Thanks!
