3ds Max: Gun Modeling For Dummies
Posted: Sun Dec 12, 2004 8:37 pm
Ok, so you've decided to go into modeling, and starting out with guns. Great. Turn back now and forever hold your peace until you get photoshop cs. Then start skinning weapons and vehicles. I'm not talking about modifying current halo skins. I'm talking about making brand new pieces of art in photoshop, that don't look like plasma goo made from filters. I want metal that has a realistic light source and refracts light. I want synthetic material that looks synthetic. I want wood that has a nice dark red or light brown. Learn how to skin onto a uv mesh. Please. (Skinning tutorials at bottom)
If you are really determined to model, please think about it. Try skinning, there is a lack of skinners more desperate than water in the sahara desert.
Ok. The real deal here. Gun modeling is an art. Take it seriously. If you don't want to spend several hours a day, looking at the max interface and doing tedious vertex moving and holding down the shift and alt buttons, don't try to be the best modeler out there, it takes dedication and hard work. This tutorial only uses 3ds max 7. Download the trial at www.discreet.com
Ways to Model:
There are lots of different ways to model. Poly-by-poly,splines, box modeling, plane modeling, cylinder modeling, sphere modeling, AHH! The answer to this one is simple, plane modeling. It is the most efficient polycount conservative, and is very clean, but it takes a little bit longer than some of the other ways. Plane modeling is simple. Make a plane primitive. Use insert vertex, extrude by selecting an edge, holding shift, and dragging the edge by using the move cursor. While plane modeling, always use a reference picture of the gun or concept you are modeling and use it to exactly line your vertices up to the model. Make sure to spend hours upon hours looking for several reference pictures to ensure the accuracy of the gun you are modeling.
Vocabulary:
Polycount- the triangle count
Quad polies- polygons with 4 sides/using 4 vertices
Triangles- the basic shapes rendering engines of video games use (that is why polycounts are based on triangles)
Mesh- Model surface
Vertex (vertices are plural form)- those little dots that make up as points which edges connect and faces are made.
Edges- those lines between the vertices which make up as sections, in plane modeling, between different surfaces.
Faces- the things you visually see while rendering. Made up from edges and vertices.
Tools to use often:
Editable Poly>Edge Subobject>Insert Vertex- Insert vertex is no doubt the single most useful modeling tool i have ever found for flat surfaces. It allows you to insert a vertex anywhere on any edge. You can move the vertex (and it's portion of the edge) anywhere.
Editable Poly>Edge Subobject>Chamfer- Makes smoothing out and making rough edges less jagged VERY easy. Just select the edge(s) you want to smooth and then click the little box beside chamfer, set the size of the chamfer. The more you use chamfer, the more smooth it gets. Don't make it too smooth, or you'll see your polycount turn into the sumo weight class.
Editable Poly>Vertex Subobject>Remove- The mother of all cleanup and polycount reduction. Remove edges to make your mesh cleaner, remove vertices to lower those polycounts. Don't remove an edge when it's an edge to the whole object, and don't remove edges that do not cross a polygon or it will mess it up and make errors where edges should be.
Editable Poly>Polygon [edges (see plane modeling)] Subobject>Extrude- The only way to make different surfaces in plane modeling. It creates an edge, and a set of new vertices, if used on polygons, it will make the whole polygon be jutting out of a surface, or intruding into the surface, i love this tool.
Editable Poly>Polygon Subobject>Bevel- Just makes life easier, extrudes, then scales the top (or bottom) face.
Editable Poly>Vertex Subobject>Weld and Target Weld- Another great tool. You can connect one part of your model to another, and reducing polycounts! Select 2 or more vertices to weld, and click the box next to weld to weld any given selected vertices in the cubic area of the parameter. Target weld is the same idea but instead, you don't move all the welded vertices to ward each other to bond into one, you move one vertex to another, then bonding.
Editable Poly>Polygon Subobject>Create- Makes new polygons by selecting vertices in a counter clockwise motion. Don't forget to make different polygons if there is another surface.
Editable Poly>Edge Subobject>Connect- select 2 parallel edges on the same Polygon and click the box beside connect to determine how many edges there will be between the corresponding edges.
Editable Poly>Vertex/Edge Subobject>Slice Plane- Makes an edge with vetices on the selected edges or if no edges selected, across the whole model, you can move and rotate the slice plane interface to determine where the edges and vertices will be.
Things to Watch out for:
Nonplanar faces- the bane of all evil, nonplanar faces are quad polygons that, when rendered, look wierd, and you can see the individual triangles. This means that your vertices aren't lined up correctly. Try lining up your vertices on the x axis if they make up a flat surface on the gun. If you just can't get it, you can use the Make Planar button in Editable Poly>Polygon Subobject>Edit Geometry. I rarely use the make planar button because it can make adjacent faces nonplanar, which can cause problems.
Flipped Faces- goes along the lines of nonplanar faces, flipped faces are the ones that are invisible, but a face is really there, it's just on the other side, so the side that faces you is invisible. Click the invisible face, then click Editable Mesh>Polygon Subobject>flip normal. You can always just delete the face, then make it again, selecting the vertices in a COUNTER-CLOCKWISE direction.
Lack of Detail- You will be eviscerated, demolished, crushed, pounded, and eaten if you go to a serious modeling/skinning/animating forum where things actually get done. Model every detail, EVERY DETAIL, on the real life/concept gun you are modeling. It doesn't matter if it takes you 6 months to complete the model, just model the whole thing completely. Remember, you can always remove some details if the polygon/triangle count is too high.
Polycount Waste- Polygon waste, when you post renders also post wireframes, and take a look at them
Polygon Counts- to look at the current polygon count, you can go under the Max utilities tab, and go to the option polygon counter and use it, make sure count triangles is selected and it will show you your polygon count. Here are some parameters: Pistol- 1200-2000 polies SMG- 1500-2200 Rifle- 2000-3500 Machine Gun (not just a fully automatic gun, a full sized machine gun)- 2200-3500
Third person models should all be very low poly, just enough to be distinguishable from each other.
Keep it Clean- There is nothing worse than looking at a thing with thousands upon thousands of lines criss crossing, this way and that in no general order or correlation. Those are obviously the triangles. If you keep it clean, by having all FLAT surfaces as one polygon, no lines going across it, you will have a much better time modeling. If you leave the triangle placement to the program, it will keep the polycount lower, it will be much easier on the eyes, and there will be less room for errors.
Accept Criticism- Accept constructive criticism with open arms, even if blunt and brutally honest. Everybody is entitled to an opinion and their opinions count, even if they aren't modelers. The people playing with the model will be the ones actually seeing it. Even if someone is of lower skill level than you, accept their suggestions and comments, they might've learned something you haven't. Criticism and changes will turn a good model into a great one.
Rendering- Rendering makes or breaks a model, unfortunately, so it's all about sprucing up the model so it looks sexy. Scene lights, custom textures and things along those lines help. Dont open up you render in photoshop and start doing shit like that to it, it'll just ruin all the scene lights and stuff like that. Best way to render, put a skylight in, turn 'cast shadows' on and use 10 to 20 rays. You can also put in some shadow casting omni lights. Darkstorn's rendering .max file is floating around, i'll likely host it and give it to all you noobies to render
Don't Give up- Plane modeling takes practice, no doubt about it, i'm still learning new things with plane modeling!
Step by Step tuts by me
Reference imaging tutorial.
Setting up the max scene for optimal modeling is essential to your successful modeling experience, here is a step by step tutorial for making any REAL gun.
1. Find a reference picture that is directly from the side, at an almost exact 90 degree angle that is as large in pixels as possible. for example: http://img.photobucket.com/albums/v216/ ... 92pic3.jpg
2. Make a plane whose size is equal to the amount of pixels of your reference pictures, for example, my pic of the berreta 92 is 3250x2550, so you make a plane which has a length of 2550 and a width of 3250 with the left viewport selected. If you don't have the left viewport selected the plane won't be created facing the right way.
3. Open the material editor, and click the box next to diffuse. Browse to your bitmap and apply it to the plane, then click the white and blue colored cube in the material editor. The picture should appear on the plane.
4. Right-click on the left viewport name and click "smooth with highlights". The reference picture should appear in the left viewport.
5. Move the plane back on the x axis so it doesn't get in the way of anything you make.
6. Maximize the left viewport by clicking the very bottom right corner button with the left viewport selected.
7. Press g on your keyboard to get rid of the grid.
Your Max is now set for plane modeling!
Rendering Tutorial
1. Download darkstorn's rendering .max file from www.gamersmetropolis.com/files/renderer.max
2. Open up the 'renderer' max file.
3. Press File>Merge... and browse to your model's file.
4. Merge all neccesary objects and place them in the center, where the box is
5. Open material editor and apply the 2 - Default material, or the second one, to the object you are rendering
5. Delete the box, and press f9 or render it normally.
TUTORIALS!!!!
http://tutorials.moddb.com/16/ <<<<-the only plane modeling tutorial i can find
Modeling Tuts (ugly ones for extreme beginners):
http://www.baconbomb.com/modworks/tut_g ... eling.html
http://www.fh-worms.de/~inf126/tutorial ... index.html
Skinning Tuts:
http://cdg.csnation.net/viewtopic.php?t=15340
http://cdg.csnation.net/viewtopic.php?t=15172
http://cdg.csnation.net/viewtopic.php?t=15346
http://cdg.csnation.net/viewtopic.php?t=3517

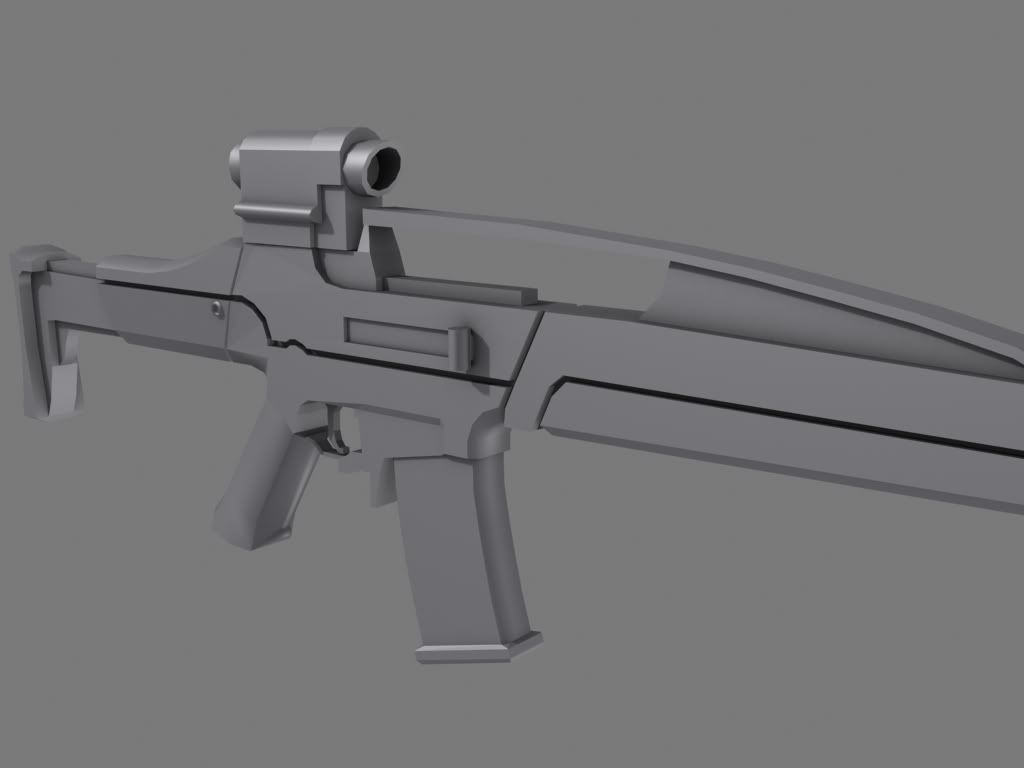
an xm8 i made a few months ago (i will finish it some time over the next week

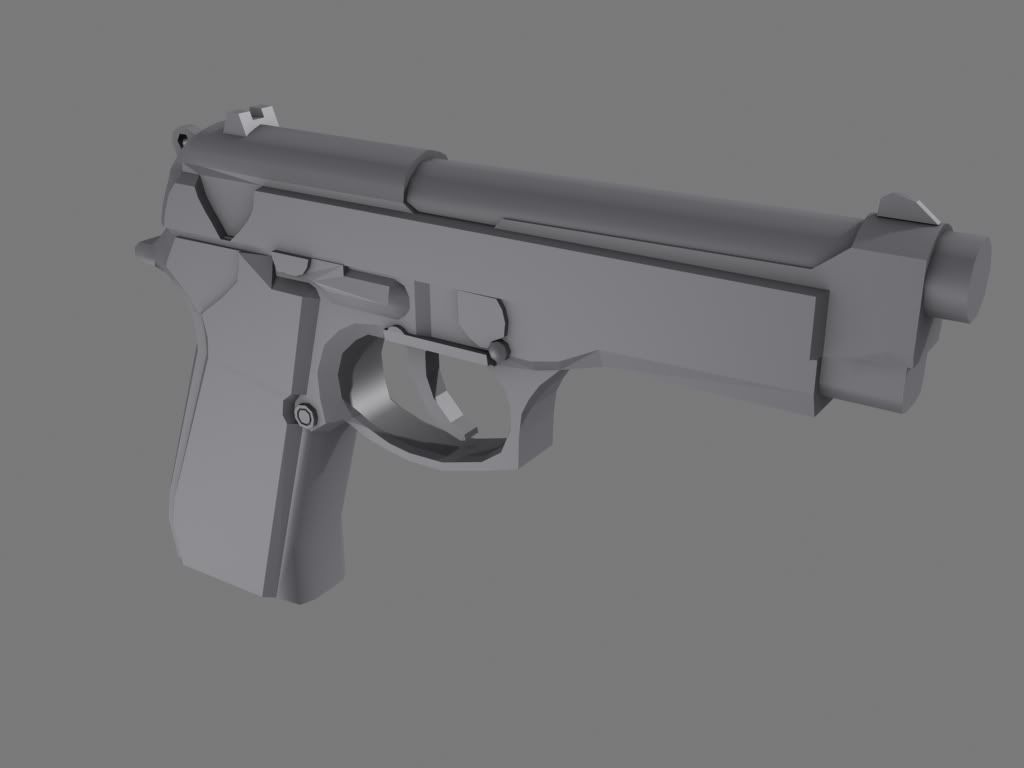
model i made yesterday/today
"I came, I saw, I conquered"
-Julius Caesar
"I came, I saw, I conquered. Life is that brief interlude between nothingness and eternity. Use it"
-Katarn
If you are really determined to model, please think about it. Try skinning, there is a lack of skinners more desperate than water in the sahara desert.
Ok. The real deal here. Gun modeling is an art. Take it seriously. If you don't want to spend several hours a day, looking at the max interface and doing tedious vertex moving and holding down the shift and alt buttons, don't try to be the best modeler out there, it takes dedication and hard work. This tutorial only uses 3ds max 7. Download the trial at www.discreet.com
Ways to Model:
There are lots of different ways to model. Poly-by-poly,splines, box modeling, plane modeling, cylinder modeling, sphere modeling, AHH! The answer to this one is simple, plane modeling. It is the most efficient polycount conservative, and is very clean, but it takes a little bit longer than some of the other ways. Plane modeling is simple. Make a plane primitive. Use insert vertex, extrude by selecting an edge, holding shift, and dragging the edge by using the move cursor. While plane modeling, always use a reference picture of the gun or concept you are modeling and use it to exactly line your vertices up to the model. Make sure to spend hours upon hours looking for several reference pictures to ensure the accuracy of the gun you are modeling.
Vocabulary:
Polycount- the triangle count
Quad polies- polygons with 4 sides/using 4 vertices
Triangles- the basic shapes rendering engines of video games use (that is why polycounts are based on triangles)
Mesh- Model surface
Vertex (vertices are plural form)- those little dots that make up as points which edges connect and faces are made.
Edges- those lines between the vertices which make up as sections, in plane modeling, between different surfaces.
Faces- the things you visually see while rendering. Made up from edges and vertices.
Tools to use often:
Editable Poly>Edge Subobject>Insert Vertex- Insert vertex is no doubt the single most useful modeling tool i have ever found for flat surfaces. It allows you to insert a vertex anywhere on any edge. You can move the vertex (and it's portion of the edge) anywhere.
Editable Poly>Edge Subobject>Chamfer- Makes smoothing out and making rough edges less jagged VERY easy. Just select the edge(s) you want to smooth and then click the little box beside chamfer, set the size of the chamfer. The more you use chamfer, the more smooth it gets. Don't make it too smooth, or you'll see your polycount turn into the sumo weight class.
Editable Poly>Vertex Subobject>Remove- The mother of all cleanup and polycount reduction. Remove edges to make your mesh cleaner, remove vertices to lower those polycounts. Don't remove an edge when it's an edge to the whole object, and don't remove edges that do not cross a polygon or it will mess it up and make errors where edges should be.
Editable Poly>Polygon [edges (see plane modeling)] Subobject>Extrude- The only way to make different surfaces in plane modeling. It creates an edge, and a set of new vertices, if used on polygons, it will make the whole polygon be jutting out of a surface, or intruding into the surface, i love this tool.
Editable Poly>Polygon Subobject>Bevel- Just makes life easier, extrudes, then scales the top (or bottom) face.
Editable Poly>Vertex Subobject>Weld and Target Weld- Another great tool. You can connect one part of your model to another, and reducing polycounts! Select 2 or more vertices to weld, and click the box next to weld to weld any given selected vertices in the cubic area of the parameter. Target weld is the same idea but instead, you don't move all the welded vertices to ward each other to bond into one, you move one vertex to another, then bonding.
Editable Poly>Polygon Subobject>Create- Makes new polygons by selecting vertices in a counter clockwise motion. Don't forget to make different polygons if there is another surface.
Editable Poly>Edge Subobject>Connect- select 2 parallel edges on the same Polygon and click the box beside connect to determine how many edges there will be between the corresponding edges.
Editable Poly>Vertex/Edge Subobject>Slice Plane- Makes an edge with vetices on the selected edges or if no edges selected, across the whole model, you can move and rotate the slice plane interface to determine where the edges and vertices will be.
Things to Watch out for:
Nonplanar faces- the bane of all evil, nonplanar faces are quad polygons that, when rendered, look wierd, and you can see the individual triangles. This means that your vertices aren't lined up correctly. Try lining up your vertices on the x axis if they make up a flat surface on the gun. If you just can't get it, you can use the Make Planar button in Editable Poly>Polygon Subobject>Edit Geometry. I rarely use the make planar button because it can make adjacent faces nonplanar, which can cause problems.
Flipped Faces- goes along the lines of nonplanar faces, flipped faces are the ones that are invisible, but a face is really there, it's just on the other side, so the side that faces you is invisible. Click the invisible face, then click Editable Mesh>Polygon Subobject>flip normal. You can always just delete the face, then make it again, selecting the vertices in a COUNTER-CLOCKWISE direction.
Lack of Detail- You will be eviscerated, demolished, crushed, pounded, and eaten if you go to a serious modeling/skinning/animating forum where things actually get done. Model every detail, EVERY DETAIL, on the real life/concept gun you are modeling. It doesn't matter if it takes you 6 months to complete the model, just model the whole thing completely. Remember, you can always remove some details if the polygon/triangle count is too high.
Polycount Waste- Polygon waste, when you post renders also post wireframes, and take a look at them
Polygon Counts- to look at the current polygon count, you can go under the Max utilities tab, and go to the option polygon counter and use it, make sure count triangles is selected and it will show you your polygon count. Here are some parameters: Pistol- 1200-2000 polies SMG- 1500-2200 Rifle- 2000-3500 Machine Gun (not just a fully automatic gun, a full sized machine gun)- 2200-3500
Third person models should all be very low poly, just enough to be distinguishable from each other.
Keep it Clean- There is nothing worse than looking at a thing with thousands upon thousands of lines criss crossing, this way and that in no general order or correlation. Those are obviously the triangles. If you keep it clean, by having all FLAT surfaces as one polygon, no lines going across it, you will have a much better time modeling. If you leave the triangle placement to the program, it will keep the polycount lower, it will be much easier on the eyes, and there will be less room for errors.
Accept Criticism- Accept constructive criticism with open arms, even if blunt and brutally honest. Everybody is entitled to an opinion and their opinions count, even if they aren't modelers. The people playing with the model will be the ones actually seeing it. Even if someone is of lower skill level than you, accept their suggestions and comments, they might've learned something you haven't. Criticism and changes will turn a good model into a great one.
Rendering- Rendering makes or breaks a model, unfortunately, so it's all about sprucing up the model so it looks sexy. Scene lights, custom textures and things along those lines help. Dont open up you render in photoshop and start doing shit like that to it, it'll just ruin all the scene lights and stuff like that. Best way to render, put a skylight in, turn 'cast shadows' on and use 10 to 20 rays. You can also put in some shadow casting omni lights. Darkstorn's rendering .max file is floating around, i'll likely host it and give it to all you noobies to render
Don't Give up- Plane modeling takes practice, no doubt about it, i'm still learning new things with plane modeling!
Step by Step tuts by me
Reference imaging tutorial.
Setting up the max scene for optimal modeling is essential to your successful modeling experience, here is a step by step tutorial for making any REAL gun.
1. Find a reference picture that is directly from the side, at an almost exact 90 degree angle that is as large in pixels as possible. for example: http://img.photobucket.com/albums/v216/ ... 92pic3.jpg
2. Make a plane whose size is equal to the amount of pixels of your reference pictures, for example, my pic of the berreta 92 is 3250x2550, so you make a plane which has a length of 2550 and a width of 3250 with the left viewport selected. If you don't have the left viewport selected the plane won't be created facing the right way.
3. Open the material editor, and click the box next to diffuse. Browse to your bitmap and apply it to the plane, then click the white and blue colored cube in the material editor. The picture should appear on the plane.
4. Right-click on the left viewport name and click "smooth with highlights". The reference picture should appear in the left viewport.
5. Move the plane back on the x axis so it doesn't get in the way of anything you make.
6. Maximize the left viewport by clicking the very bottom right corner button with the left viewport selected.
7. Press g on your keyboard to get rid of the grid.
Your Max is now set for plane modeling!
Rendering Tutorial
1. Download darkstorn's rendering .max file from www.gamersmetropolis.com/files/renderer.max
2. Open up the 'renderer' max file.
3. Press File>Merge... and browse to your model's file.
4. Merge all neccesary objects and place them in the center, where the box is
5. Open material editor and apply the 2 - Default material, or the second one, to the object you are rendering
5. Delete the box, and press f9 or render it normally.
TUTORIALS!!!!
http://tutorials.moddb.com/16/ <<<<-the only plane modeling tutorial i can find
Modeling Tuts (ugly ones for extreme beginners):
http://www.baconbomb.com/modworks/tut_g ... eling.html
http://www.fh-worms.de/~inf126/tutorial ... index.html
Skinning Tuts:
http://cdg.csnation.net/viewtopic.php?t=15340
http://cdg.csnation.net/viewtopic.php?t=15172
http://cdg.csnation.net/viewtopic.php?t=15346
http://cdg.csnation.net/viewtopic.php?t=3517

an xm8 i made a few months ago (i will finish it some time over the next week

model i made yesterday/today
"I came, I saw, I conquered"
-Julius Caesar
"I came, I saw, I conquered. Life is that brief interlude between nothingness and eternity. Use it"
-Katarn