Creating the Biped
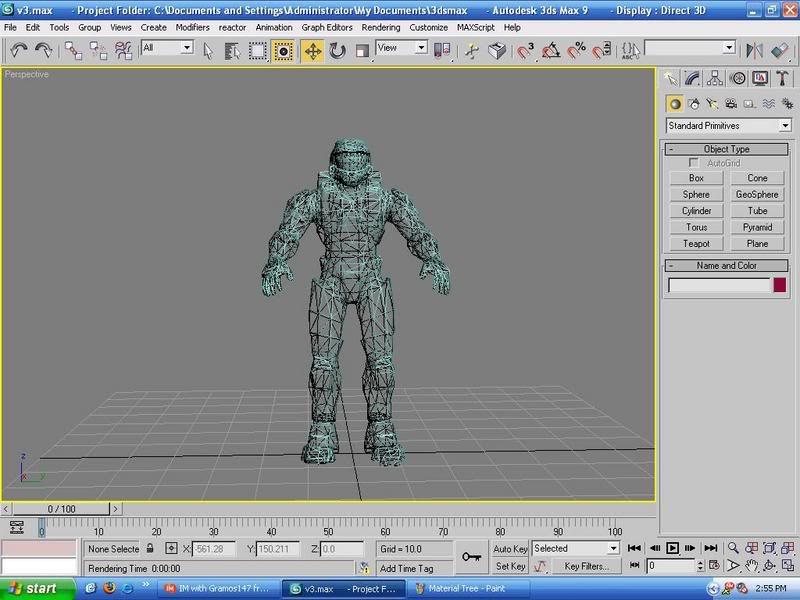
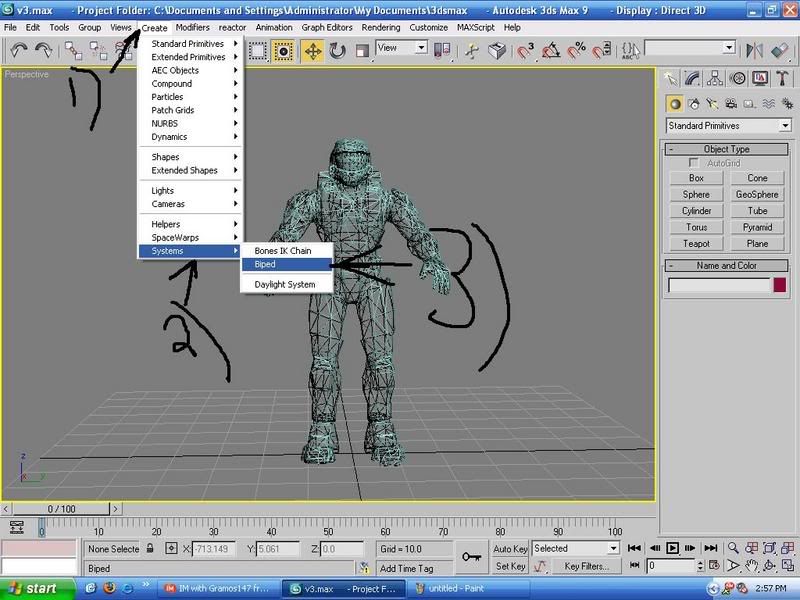
First You want to open 3ds Max( I have version 9, so my controls might a wee bee different if you have a different version.) Open you MC, then Click Create>Systems>Biped
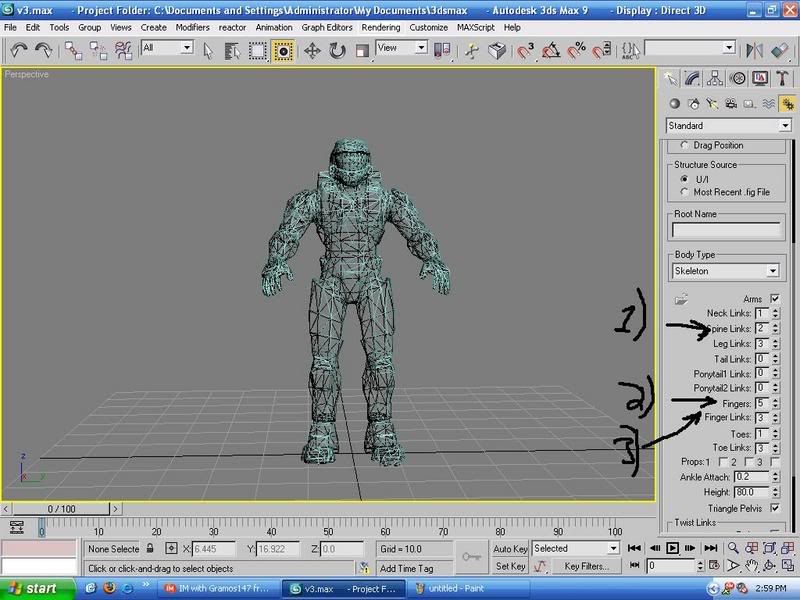
Next is setup the Biped. You do this by looking at the right side of your screen. There should be a Biped Tool Box kinda of thing. Change the Spine links to 2
Fingers to 5
Finger links to 3
Positioning Biped
IMPORTANT
First before you doing anything go into figure mode.
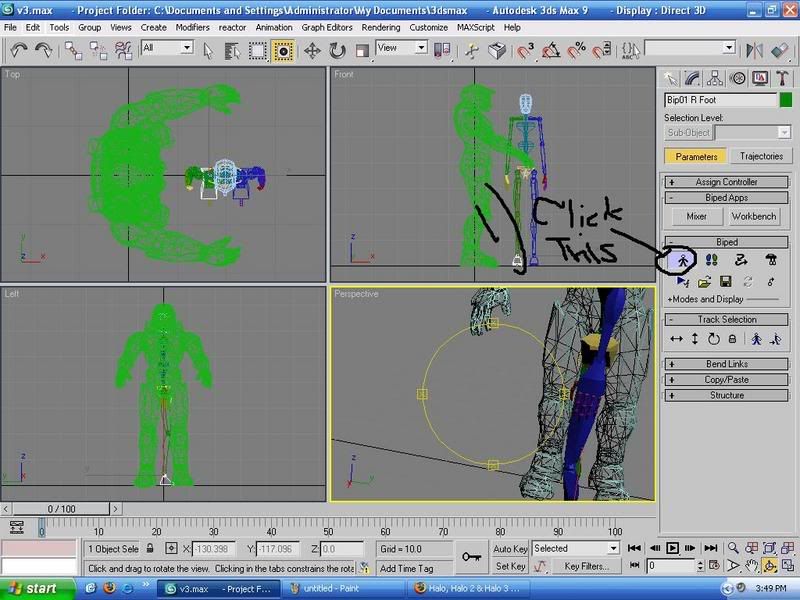
Next Create the Biped by click in the Window showed in picture and drag up to around the Mc Head.
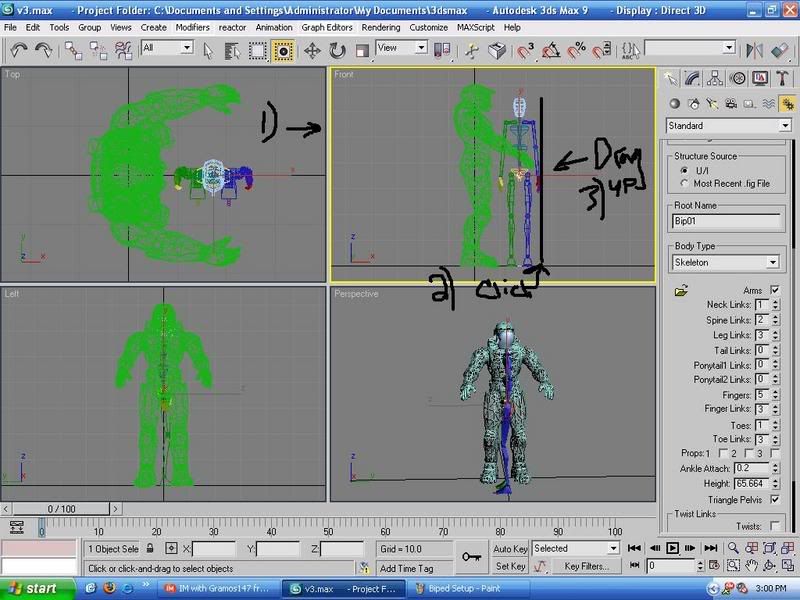
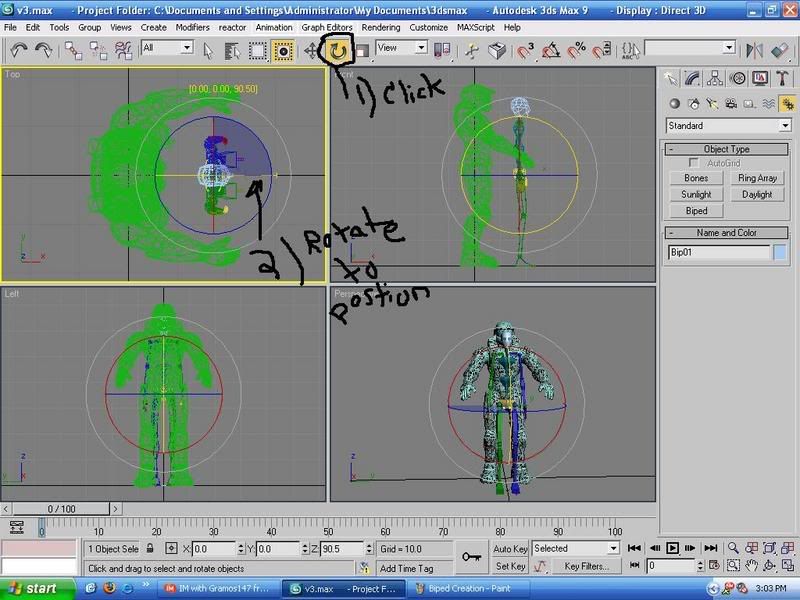
Next go the the windows to the left of it. Click the rotation tool and rotate the biped around so it is facing the way showed in the pic.
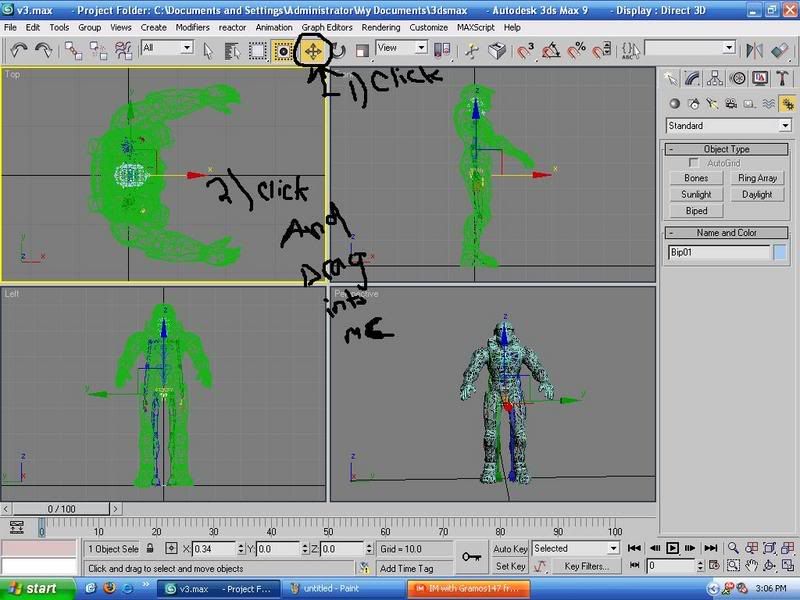
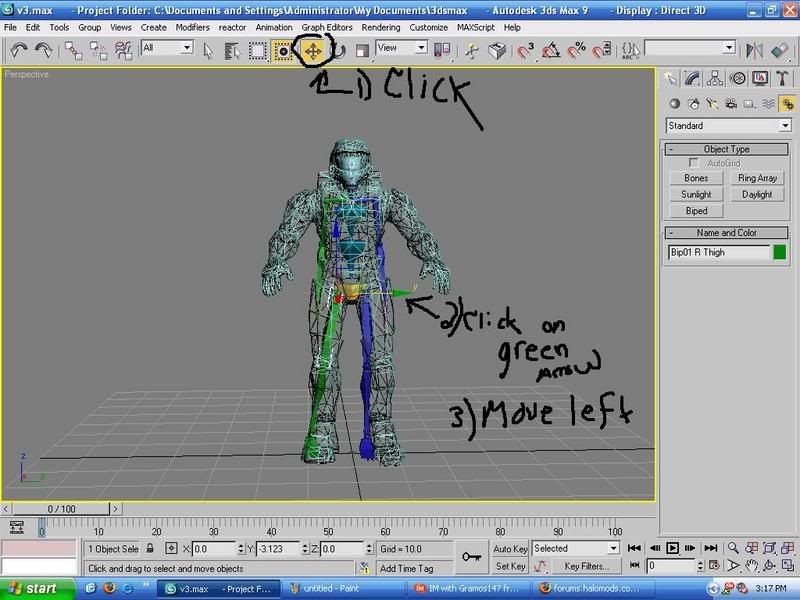
Next move the biped into the MC's mesh. DO this by clicking the pointer tool and click the red arrow to move the biped.
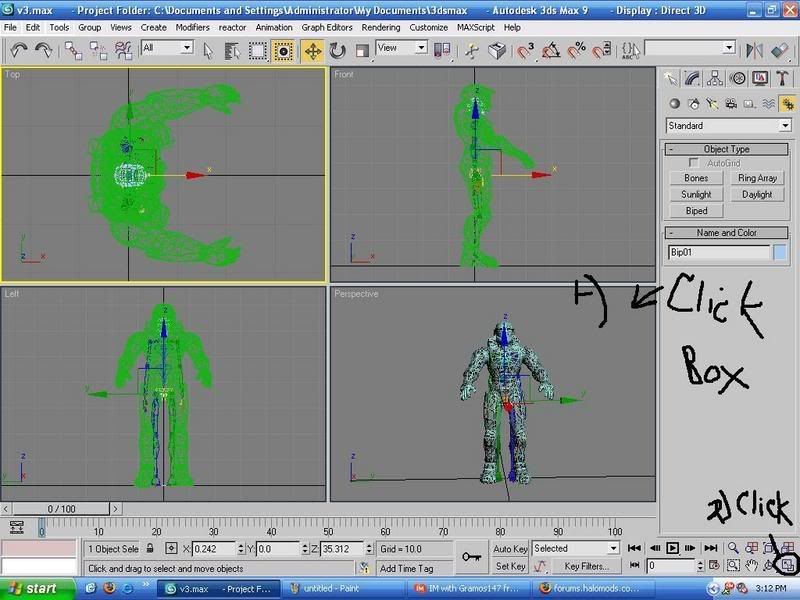
Next we will make the screen bigger. By click the button that makes it bigger, look at pic lol.
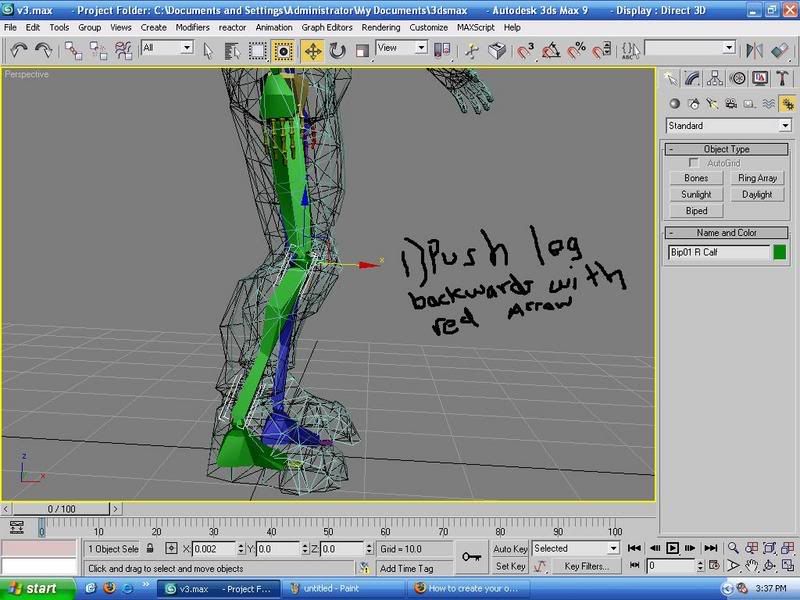
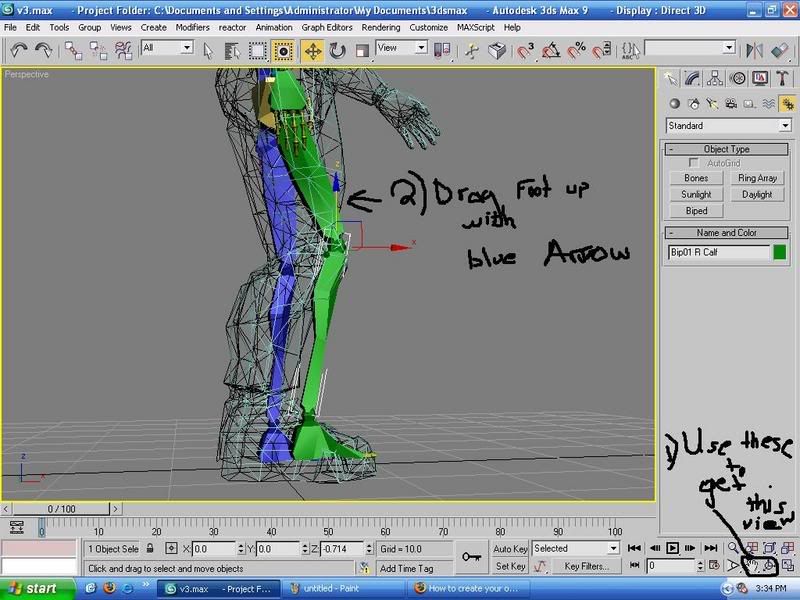
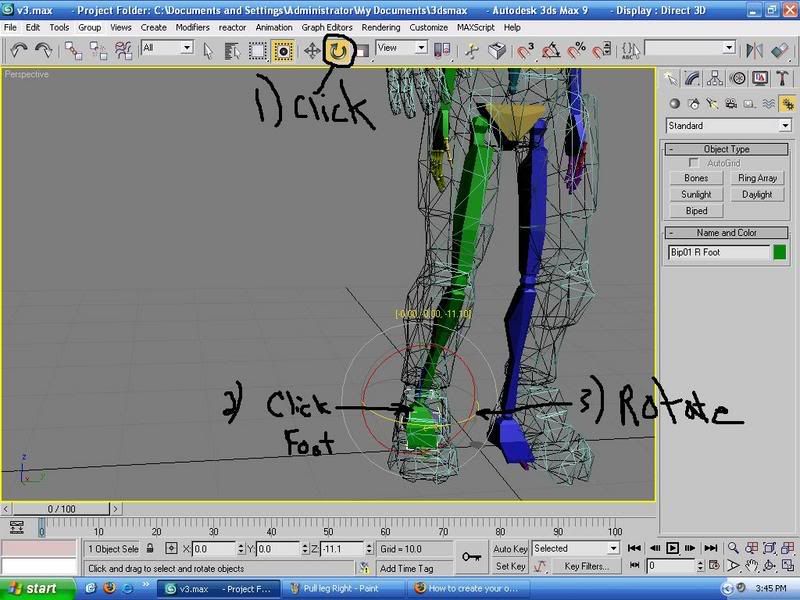
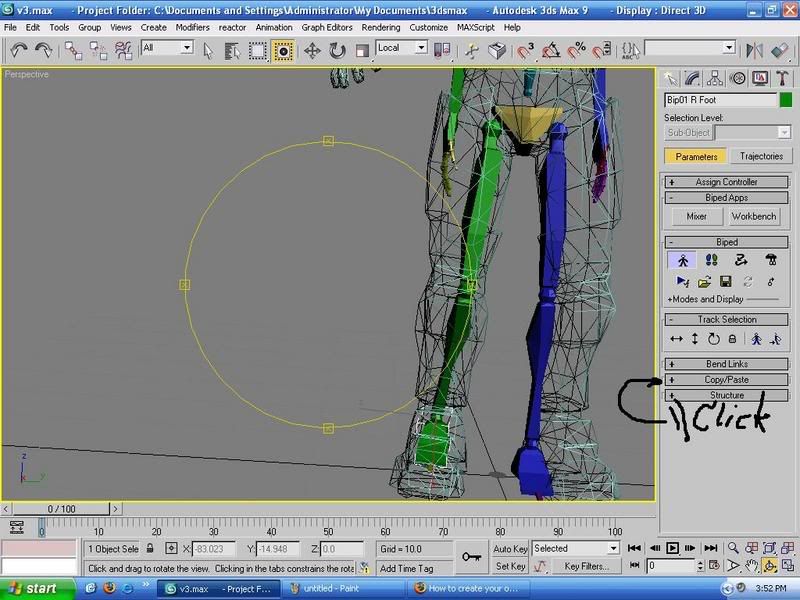
We will work on the leg next. All instructions are in the pics for the leg.
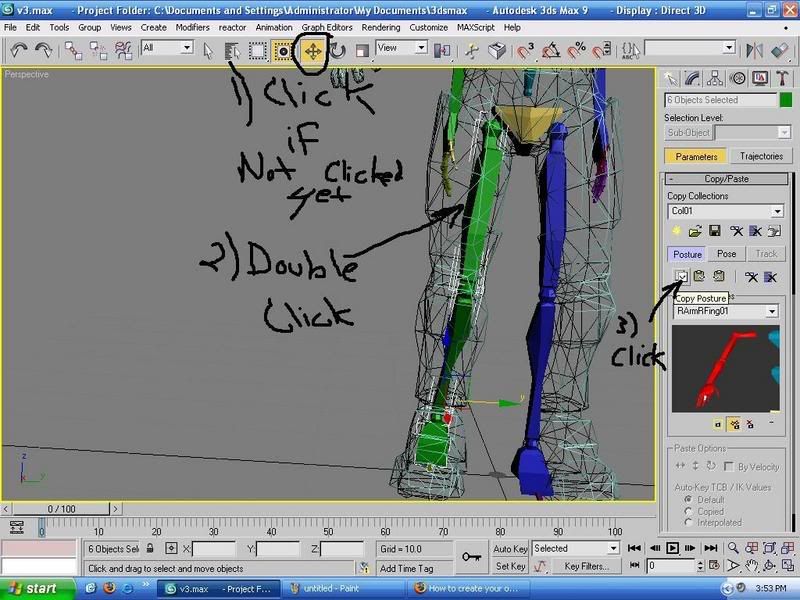
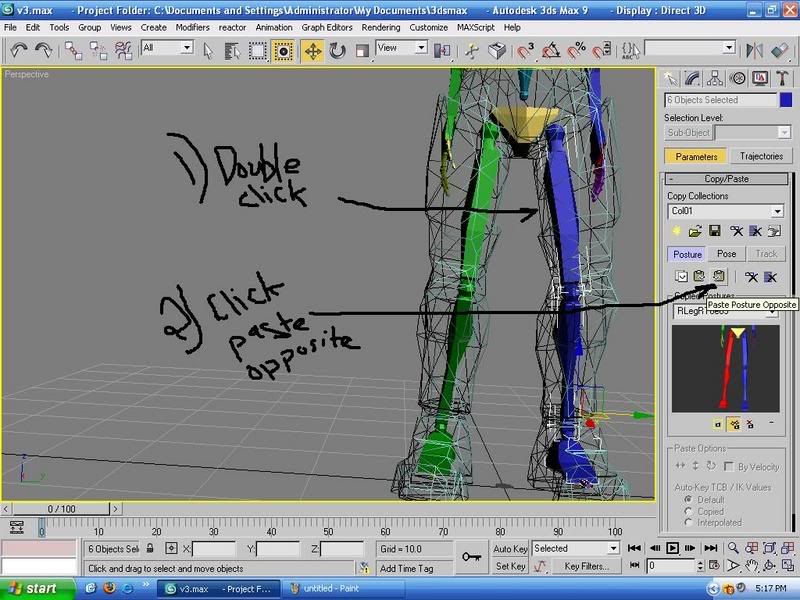
Now on to other leg but 3ds Max 9 has a wonderful feature called COPY/PASTE!!!!! So roll the right side of the 3ds max down to copy/paste and Follow the next set of pictures.
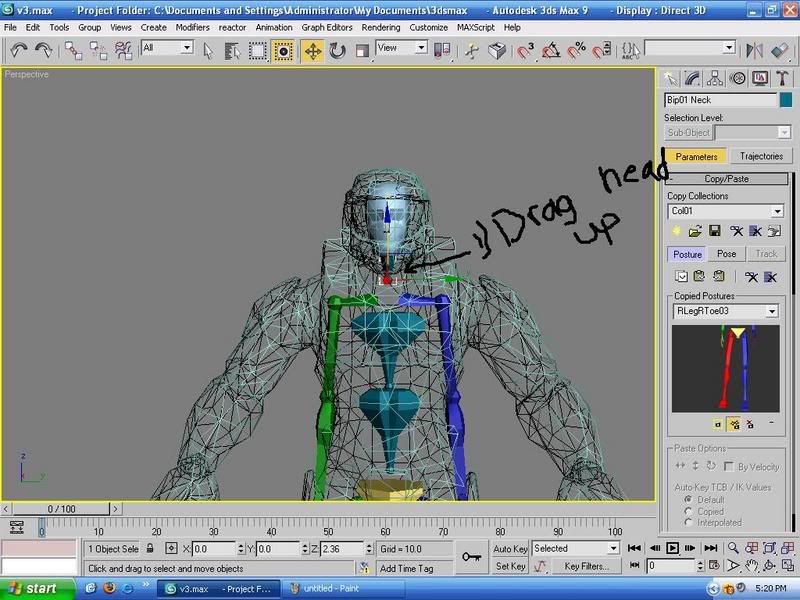
WOO HOO done with LEG legs go to the head, if you have one, jk.
Follow this pic to position the head.
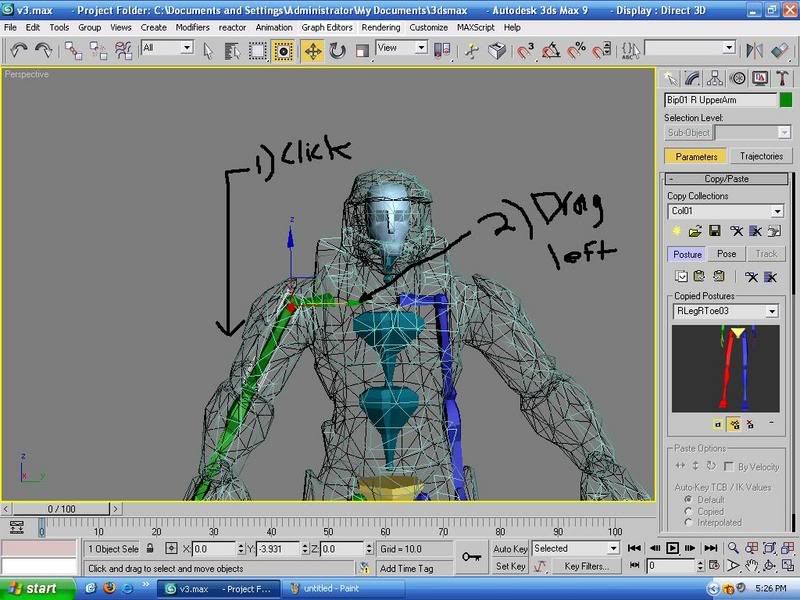
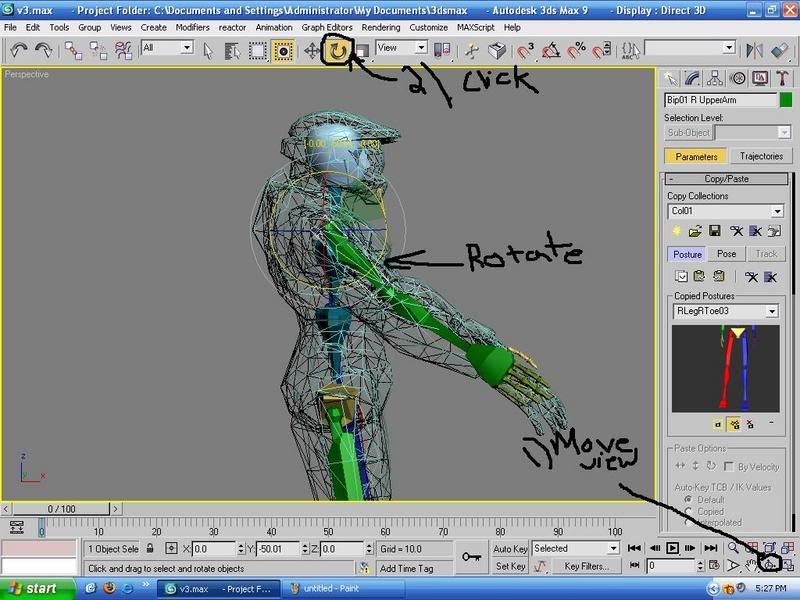
First SAVE. Next is the ARM. Follow these sets of pic to position the arm.
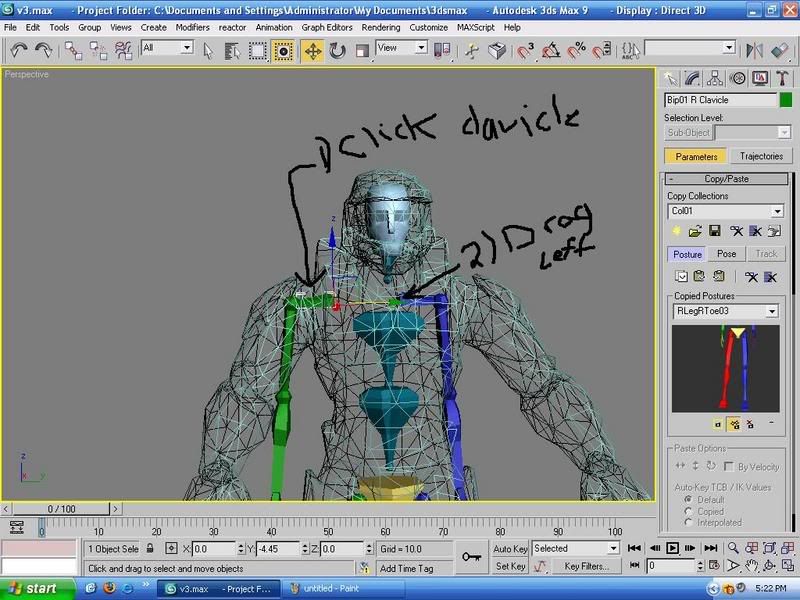

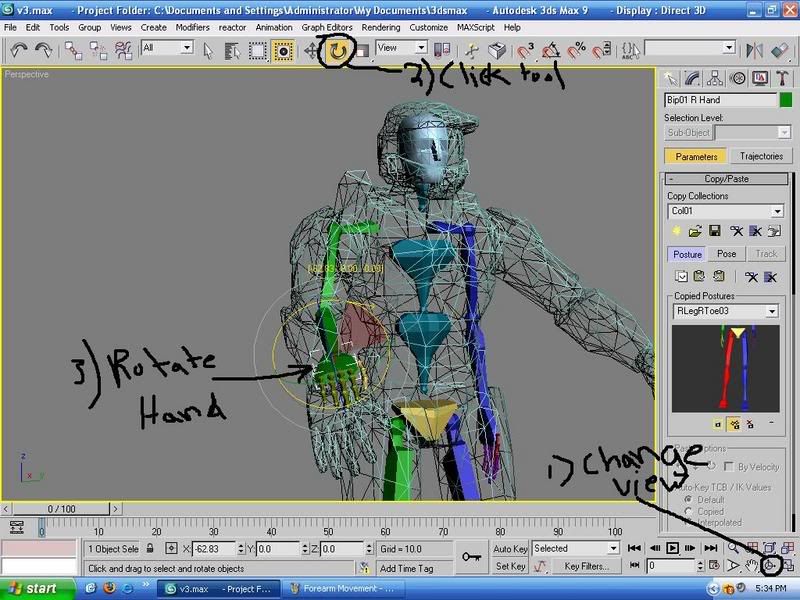
Note you may need to move the calvicle down.And for the fingers no pics but usually all you need to do it rotate them down a wee bit. After this you can copy and paste, the same way you did for the legs.
And you should be DONE!! SAVE and apply the material to check if the biped is showing if it is adjust the biped as needed. Thanks for reading good luck on your Halo 2 Render and I hoped you earned something from this, and if you need pics on a specific thing post here and I will try to get it in as soon as possible.


