3DS MAX Renders for n00b's (part 1 of 2)
Posted: Thu Sep 15, 2005 7:34 am
Okay, lots to do, little time to do it in.
I posted this because Platt's tutorial is getting a lot of people confused. And they are coming to me asking for help... and it's annoying...
I have about 2x more pictures than Platt, and I actually did it right.
U need these:
ADI (Most updated version)
with the modlib plugin
Ch2r (Most updated version)
3DS MAX (preferably 7)
Adobe Photoshop (preferably CS2 v9.0)
THIS .dds plug-in for PS
http://rapidshare.de/files/3702627/dds.8bi.html
To get started....
Open Ch2r and open mainmenu.map. (if u dont know how to do that u dont deserve to have renders, let alone mods)
find these files, extract them.

Double Click the files in order and hit extract, save them to a folder.

Now go into that folder on your comp and delete these files. You don't need them. They are a waste of space.

Open Photoshop, and open masterchief.0.0.dds.
JUST SAY NOOO!

lol
Now change the image size to 1024x1024.
Image>Image Size


Save file as masterchief.1.0.dds

Make sure you have both .DDS in the file type, AND you type it in to the file name, sometimes 3DS can't detect it because it will be saved as a .0 file...
Don't ask...
Use these settings when saving.

Click "Okay" to the "Lose alpha channels" window
Now pres ctrl+4
you will see ur channels bar change to this:

press
ctrl+A
then ctrl+C
THEN ctrl+~
Your channels will change to this:

Now press ctrl+V
If you dont understand what you just did with all those ctrl's... u dont deserve to be on a computer... lol... jk.... maybe...
Your view of the picture shoudl change to this:

Go to Layer>Flatten Image

You will see Layer 1 and Backround merge into one.
Save as Masterchief_alpha.1.0.dds
Open masterchief_bump_camo.0.0.dds in Photoshop.
Resize the Image to 1024x1024,
If you dont know how to do this, scroll up a little ways, and get some memory pills.
Save as Masterchief_bump_camo.1.0.dds

U may now close PS.
Open ADI
Find the Model folder and select
objects/characters/masterchief/masterchief
Click the little house button and check the wavefront .obj box.
Click Export and save to a folder (same as your .dds' work fine)
Close ADI, and open 3DS
Import the masterchief files that end in .5


Use these settings on every object

You should see something like this:

Click on a shoulder piece of the model. If you selected the right one you should see both shoulders and a patch on the back turn white, and a box will form around them. Delete this, u dont need it and it will only f'up ur texture.

Open up the materials editor by pressing 'M'
Select the box next to diffuse and select bitmap

Select the Masterchief.1.0.dds u just saved in PS.

Press the up button to go back to the main material properties

Click the box next to specular (right beneath the diffuse one) and choose bitmap.
Open up the masterchief_alpha.1.0.dds

Press the up button until u cant anymore.
Scroll down in the window and open the 'Maps' pulldown menu.
Check the box next to bump and reflection.
Click the 'None' box next to bump, and select 'Normal Map'

U will be taken to another menu.
Click the 'None' button next to 'Normal' and select bitmap.

Open the masterchief_bump_camo.1.0.dds you resized in PS.

Press the up button a few tiems and you should see this in your materials preview window.

Now select ALL of your masterchief model in the preview windows,
EXCEPT the goggles.... the little glass part on his helmet.

Now press apply material, say selection if a window pops up.
Then press the preiview button

You shoudl have a White masterchief in your window, if you wish press F10 and redner so u can take a quick look. dont worry if everything is very dark or light... you dont have a light in ur scene yet.
Now to change the color of our beloved MC
Get this file:
http://rapidshare.de/files/5128256/mast ... t.dds.html
and save it in your MC folder.
in 3DS click the box next to diffuse again.
and select 'Mix'

keep original diffuse as underlying or what not...
the top box should have your masterchief.1.0.dds in it,
select the bottom box and choose bitmap.

Open the masterchief_diffuse_mix_amount.dds u just downloaded.

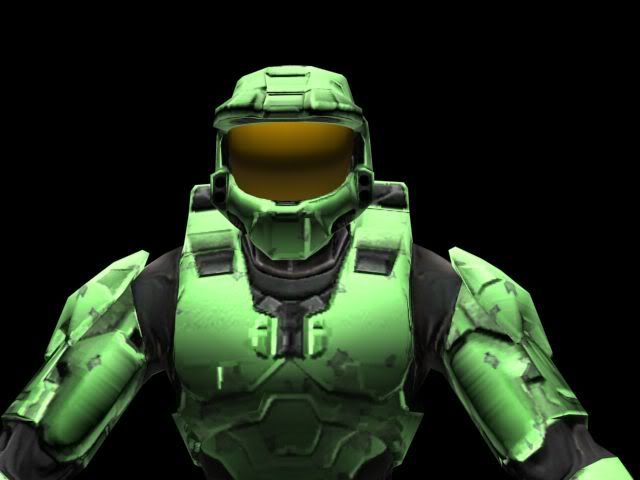
Now you can click the white or bottom color box and change the color of our MC

Now I have to go to work, so this should tide you over.
Part 2 will be out soon, explaining bipeds, props, animations, and most importantly, reflections.
I DO NOT want people IMing me or e-mailing me askign for help or what-not. I WILL NOT HELP.
You can however, post here, and PM me...
I posted this because Platt's tutorial is getting a lot of people confused. And they are coming to me asking for help... and it's annoying...
I have about 2x more pictures than Platt, and I actually did it right.
U need these:
ADI (Most updated version)
with the modlib plugin
Ch2r (Most updated version)
3DS MAX (preferably 7)
Adobe Photoshop (preferably CS2 v9.0)
THIS .dds plug-in for PS
http://rapidshare.de/files/3702627/dds.8bi.html
To get started....
Open Ch2r and open mainmenu.map. (if u dont know how to do that u dont deserve to have renders, let alone mods)
find these files, extract them.
Double Click the files in order and hit extract, save them to a folder.
Now go into that folder on your comp and delete these files. You don't need them. They are a waste of space.
Open Photoshop, and open masterchief.0.0.dds.
JUST SAY NOOO!
lol
Now change the image size to 1024x1024.
Image>Image Size
Save file as masterchief.1.0.dds
Make sure you have both .DDS in the file type, AND you type it in to the file name, sometimes 3DS can't detect it because it will be saved as a .0 file...
Don't ask...
Use these settings when saving.
Click "Okay" to the "Lose alpha channels" window
Now pres ctrl+4
you will see ur channels bar change to this:
press
ctrl+A
then ctrl+C
THEN ctrl+~
Your channels will change to this:
Now press ctrl+V
If you dont understand what you just did with all those ctrl's... u dont deserve to be on a computer... lol... jk.... maybe...
Your view of the picture shoudl change to this:
Go to Layer>Flatten Image
You will see Layer 1 and Backround merge into one.
Save as Masterchief_alpha.1.0.dds
Open masterchief_bump_camo.0.0.dds in Photoshop.
Resize the Image to 1024x1024,
If you dont know how to do this, scroll up a little ways, and get some memory pills.
Save as Masterchief_bump_camo.1.0.dds
U may now close PS.
Open ADI
Find the Model folder and select
objects/characters/masterchief/masterchief
Click the little house button and check the wavefront .obj box.
Click Export and save to a folder (same as your .dds' work fine)
Close ADI, and open 3DS
Import the masterchief files that end in .5
Use these settings on every object
You should see something like this:
Click on a shoulder piece of the model. If you selected the right one you should see both shoulders and a patch on the back turn white, and a box will form around them. Delete this, u dont need it and it will only f'up ur texture.
Open up the materials editor by pressing 'M'
Select the box next to diffuse and select bitmap
Select the Masterchief.1.0.dds u just saved in PS.
Press the up button to go back to the main material properties
Click the box next to specular (right beneath the diffuse one) and choose bitmap.
Open up the masterchief_alpha.1.0.dds
Press the up button until u cant anymore.
Scroll down in the window and open the 'Maps' pulldown menu.
Check the box next to bump and reflection.
Click the 'None' box next to bump, and select 'Normal Map'
U will be taken to another menu.
Click the 'None' button next to 'Normal' and select bitmap.
Open the masterchief_bump_camo.1.0.dds you resized in PS.
Press the up button a few tiems and you should see this in your materials preview window.
Now select ALL of your masterchief model in the preview windows,
EXCEPT the goggles.... the little glass part on his helmet.
Now press apply material, say selection if a window pops up.
Then press the preiview button
You shoudl have a White masterchief in your window, if you wish press F10 and redner so u can take a quick look. dont worry if everything is very dark or light... you dont have a light in ur scene yet.
Now to change the color of our beloved MC
Get this file:
http://rapidshare.de/files/5128256/mast ... t.dds.html
and save it in your MC folder.
in 3DS click the box next to diffuse again.
and select 'Mix'
keep original diffuse as underlying or what not...
the top box should have your masterchief.1.0.dds in it,
select the bottom box and choose bitmap.
Open the masterchief_diffuse_mix_amount.dds u just downloaded.
Now you can click the white or bottom color box and change the color of our MC
Now I have to go to work, so this should tide you over.
Part 2 will be out soon, explaining bipeds, props, animations, and most importantly, reflections.
I DO NOT want people IMing me or e-mailing me askign for help or what-not. I WILL NOT HELP.
You can however, post here, and PM me...